
 Pin
Pin
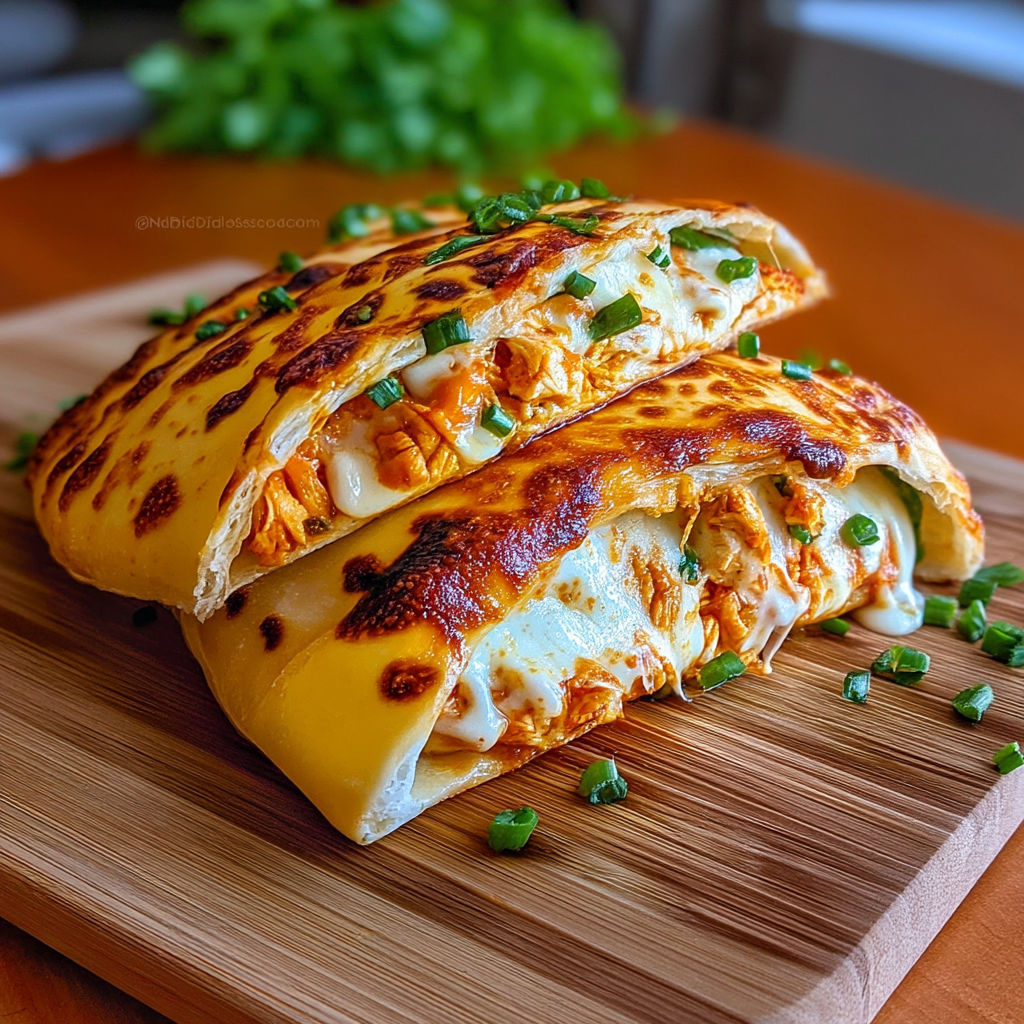
This buffalo chicken calzone transforms the classic pizza pocket into a spicy, tangy handheld meal that satisfies every game day craving. I started making these when my husband challenged me to recreate our favorite takeout order at home, and now we actually prefer this version because we can control the heat level and cheese ratio exactly how we like it.
I remember the first time I served these at a Sunday football gathering. My brother in law ate three in one sitting and still asks when I'm making them again every time he visits. The crispy golden exterior gives way to that perfect combination of spicy buffalo sauce, creamy dressing, and melted cheese that keeps everyone coming back for more.
Gather Your Ingredients
- 1 pound pizza dough: The foundation of your calzone. Store bought works wonderfully and saves time, but homemade dough gives you that authentic pizzeria texture. Look for dough that feels elastic and springs back when poked.
- 1 1/2 cups cooked chicken shredded: Rotisserie chicken is my secret weapon here because it's already seasoned and juicy. Make sure to shred it into bite sized pieces so every bite has an even distribution of filling.
- 1/2 cup buffalo wing sauce: This is where the magic happens. Choose a quality sauce with good vinegar tang and cayenne heat. I prefer Frank's RedHot Buffalo Wings Sauce for authentic flavor.
- 1 cup shredded mozzarella cheese: Whole milk mozzarella melts better and creates those gorgeous cheese pulls. Pre shredded works fine but freshly shredded from a block melts more smoothly.
- 1/4 cup ranch or blue cheese dressing: The cooling element that balances the heat. I lean toward ranch for family meals and blue cheese when cooking for adults who appreciate that sharp tangy flavor.
- 1 tablespoon chopped green onions optional: Adds a fresh pop of color and mild onion flavor that brightens the richness. The white and light green parts work best.
- 1 egg beaten for egg wash: Creates that beautiful golden brown glossy crust that makes your calzone look bakery worthy.
- All purpose flour for dusting: Prevents sticking and makes the dough easier to handle. Use sparingly because too much can make the crust tough.
How to Make It
- Preheat the Oven:
- Set your oven to 425°F and position the rack in the center. This temperature is hot enough to create a crispy exterior while thoroughly cooking the dough without burning. Line your baking sheet with parchment paper now so it's ready when you need it. The parchment prevents sticking and makes cleanup a breeze. Let the oven fully preheat for at least 15 minutes because a properly heated oven is crucial for achieving that golden brown crust with a fully cooked interior.
- Prepare Your Work Surface:
- Dust your clean countertop or large cutting board generously with flour. You want enough to prevent sticking but not so much that you're incorporating excess flour into the dough. If using refrigerated dough, let it sit at room temperature for about 10 minutes before rolling. This relaxes the gluten and makes it much easier to stretch without springing back.
- Roll Out the Dough:
- Place your dough ball in the center of the floured surface and press it down with your palms to flatten slightly. Using a rolling pin, roll from the center outward in all directions, rotating the dough occasionally to maintain an even thickness. Aim for about 1/4 inch thickness throughout. The shape can be an oval or circle depending on your preference, but make sure it's large enough to fold over and seal. If the dough keeps shrinking back, let it rest for 5 minutes and try again.
- Mix the Buffalo Chicken:
- In a medium mixing bowl, combine your shredded chicken with the buffalo sauce. Use two forks or your hands to toss everything together until every piece of chicken is coated in that vibrant orange sauce. The chicken should look glossy and evenly covered. This step is important because mixing the sauce with the chicken beforehand ensures better flavor distribution than just drizzling sauce over chicken.
- Layer the Filling:
- Imagine a line down the center of your dough circle dividing it in half. On one half only, spread your ranch or blue cheese dressing, staying about 1 inch away from the edges. This border is crucial for sealing later. The dressing creates a cooling creamy layer that prevents the buffalo chicken from making the dough soggy. Now spoon your buffalo chicken mixture over the dressed half, spreading it evenly but not too thickly. You want to leave room for the cheese and ensure the calzone can actually seal. Sprinkle the mozzarella cheese over the chicken, then add your green onions if using them.
- Seal the Calzone:
- This is the trickiest part but once you get the technique down it becomes second nature. Carefully lift the empty half of the dough and fold it over the filled half, creating a half moon shape. Line up the edges as evenly as possible. Starting at one end, press the edges together firmly with your fingertips, working your way around the entire semicircle. For an extra secure seal, use a fork to crimp the edges by pressing the tines into the sealed edge, creating a decorative ridged pattern. This not only looks professional but also helps prevent any filling from leaking out during baking.
- Apply Egg Wash and Vent:
- Beat your egg in a small bowl until the white and yolk are completely combined. Using a pastry brush or the back of a spoon, brush the entire top surface of the calzone with the beaten egg. This creates that beautiful golden shine and helps with browning. Don't skip this step because it truly transforms the appearance. Now take a sharp knife and cut 2 or 3 small slits in the top of the calzone. These vents allow steam to escape during baking, which prevents the calzone from getting soggy inside or bursting open.
- Bake to Golden Perfection:
- Carefully transfer your assembled calzone to the prepared baking sheet. Slide it into your preheated oven and set a timer for 18 minutes. Every oven is different, so start checking at the 18 minute mark. You're looking for a deep golden brown color on top and edges that look crispy and set. The calzone should feel firm when gently pressed. If it's still pale after 18 minutes, continue baking, checking every 2 minutes until you achieve that perfect color. The internal temperature should reach about 190°F if you want to check with a thermometer. Let it rest for 5 minutes before slicing because cutting into it immediately will cause all the melted cheese and sauce to run out.

The mozzarella is my favorite ingredient in this recipe because it creates that incredible cheese pull when you take your first bite. There's something deeply satisfying about quality melted mozzarella that just makes everything better. I'll never forget the time my daughter tried to eat hers too quickly and ended up with a long string of cheese from her mouth to the plate, laughing so hard she nearly cried. Now it's become a running joke in our family about who can get the longest cheese pull.
Flavor Boosters
Storage and reheating are key for achieving the best texture. Store calzones in an airtight container in the refrigerator for up to 4 days, reheating in the oven or air fryer to maintain crispiness. For freezer meals, cool calzones completely, wrap them individually, and bake directly from frozen or after thawing. You can use shredded turkey, canned chicken, or even roasted cauliflower as a filling alternative. Cheese variations like Mexican blend, pepper jack, or dairy free mozzarella all work well and bring different flavors. Combining ranch and blue cheese or subbing in crescent roll or puff pastry doughs can really make the flavors pop.
Serving Suggestions
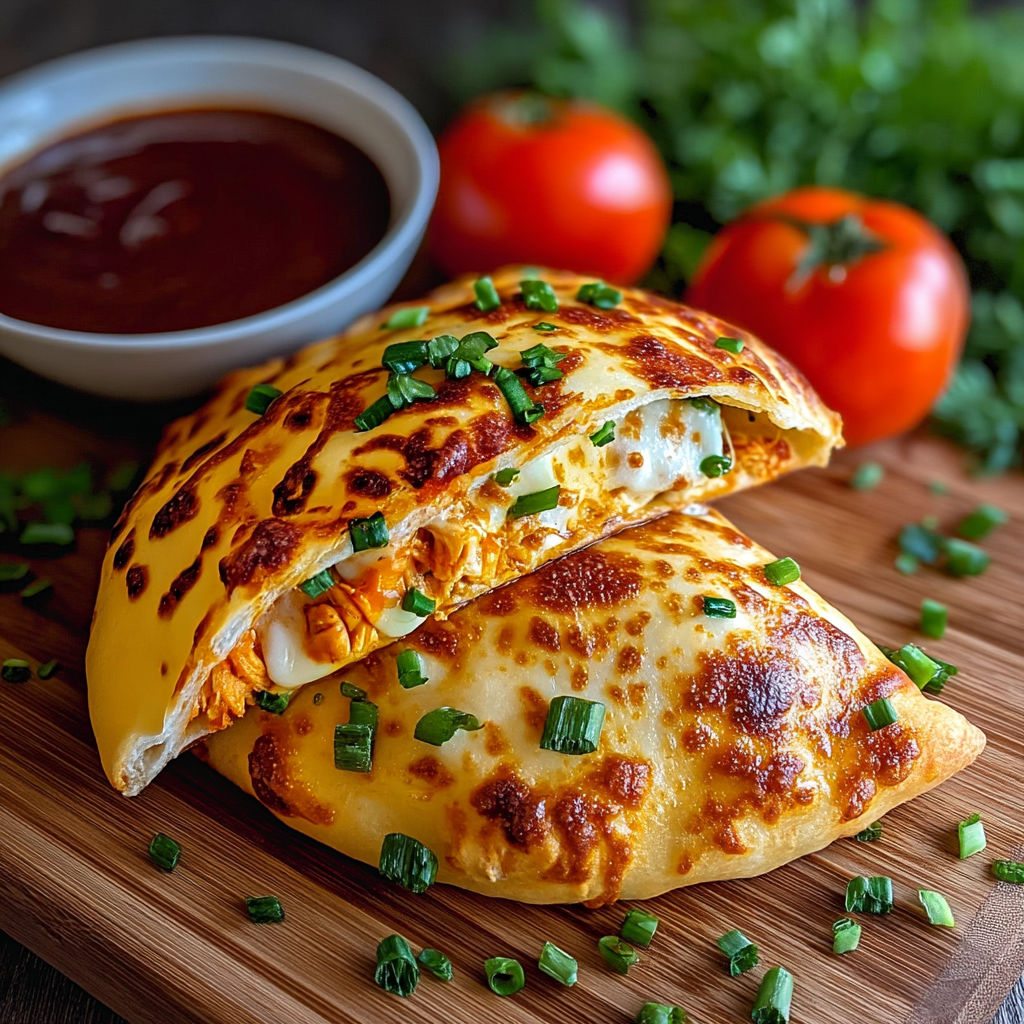
These calzones are hearty as a meal, but are perfect paired with a crisp celery and carrot stick platter, extra ranch or blue cheese for dipping, or a tangy salad. Great for game day appetizers when cut into smaller portions, and extra dips make for customized heat and creaminess. For kids, make a few with barbecue sauce or marinara instead of buffalo sauce, and serve with sweet potato or regular fries for a fun treat.
Creative Twists
Try small individual calzones in summer for a quick bake, prepare them on the grill for smoky flavor, or add sautéed mushrooms or spinach in cooler months. For colorful spring versions, use grilled chicken and fresh herbs or sliced jalapeños. Fresh mozzarella, a touch of honey in the buffalo sauce, or brushing the crust with garlic butter offer unique flavor upgrades. Embrace regional heritage by experimenting with different fillings or serving as part of a casual holiday gathering.
Making your own calzones is easier than you think and the results are always worth it. With a little practice, you will have a delicious, portable meal that tastes better than takeout and brings your family together.
Common Questions About This Recipe
- → How do I prevent my calzone from leaking during baking?
Seal the edges firmly by pinching and then crimping with a fork. Ensure the dough border is free of filling before sealing to avoid leaks.
- → Can I use homemade pizza dough?
Yes, both store-bought and homemade pizza dough work well. Allow homemade dough to come to room temperature for easier rolling.
- → Which cheese dressing is best for buffalo chicken calzone?
Ranch offers a creamy, mild flavor while blue cheese complements the buffalo sauce with its tangy profile. Choose based on personal preference.
- → What’s the best way to reheat leftovers?
Reheat in a 350°F (175°C) oven for 10-15 minutes to restore the crispy crust and melted cheese texture. Avoid microwaving to prevent sogginess.
- → Can I add vegetables to the filling?
Yes, chopped green onions, peppers, or even spinach can enhance flavor and texture. Drain any moisture from vegetables before adding.