
 Pin
Pin
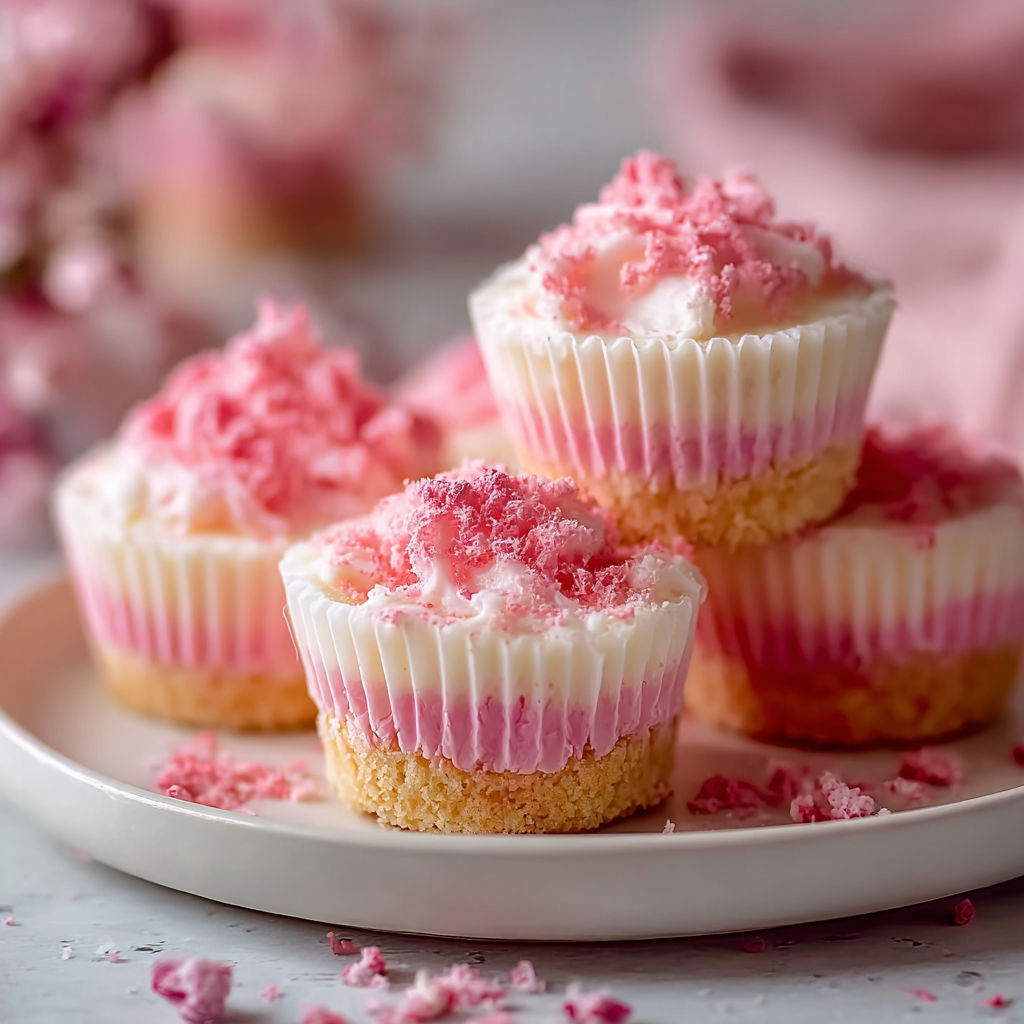
These adorable pink velvet cheesecake bites have become my go to dessert when I need something impressive but don't want to turn on the oven. The creamy texture combined with that gorgeous pink hue makes them perfect for everything from baby showers to Valentine's Day celebrations. I developed this recipe after my niece requested pink desserts for her birthday party, and they were such a hit that I now keep the ingredients stocked year round.
I first whipped these up on a particularly hot summer day when the thought of using my oven was unbearable. My family devoured them so quickly that I had to make a second batch the same evening. Now they're my secret weapon for last minute entertaining.
Gather Your Ingredients
- 1 cup graham cracker crumbs: Provides a sweet and crunchy base that holds up beautifully under the creamy filling. Look for finely ground crumbs or pulse whole crackers in a food processor until they resemble coarse sand.
- 2 tablespoons granulated sugar: Enhances the sweetness of the crust and helps balance the tangy cream cheese flavor. Regular white sugar works best here for dissolving evenly.
- 4 tablespoons unsalted butter: Adds richness and helps bind the crumbs into a firm crust. Make sure it's melted and slightly cooled before mixing.
- 8 ounces cream cheese: The foundation of any great cheesecake providing that signature tangy richness. Always use full fat cream cheese at room temperature for the smoothest texture.
- 1/2 cup powdered sugar: Ensures the filling is sweet and dissolves instantly without any grittiness. The cornstarch in powdered sugar also helps stabilize the mixture.
- 1 cup heavy cream: Adds fluffiness and richness when whipped creating that luxurious mouthfeel. Cold cream whips better so keep it refrigerated until ready to use.
- 1 teaspoon vanilla extract: Infuses warm flavor that complements the cream cheese perfectly. Pure vanilla extract tastes noticeably better than imitation.
- 1 teaspoon pink food coloring: Gives cheesecake its signature hue and festive appearance. Gel food coloring provides more vibrant color with less liquid than standard drops.
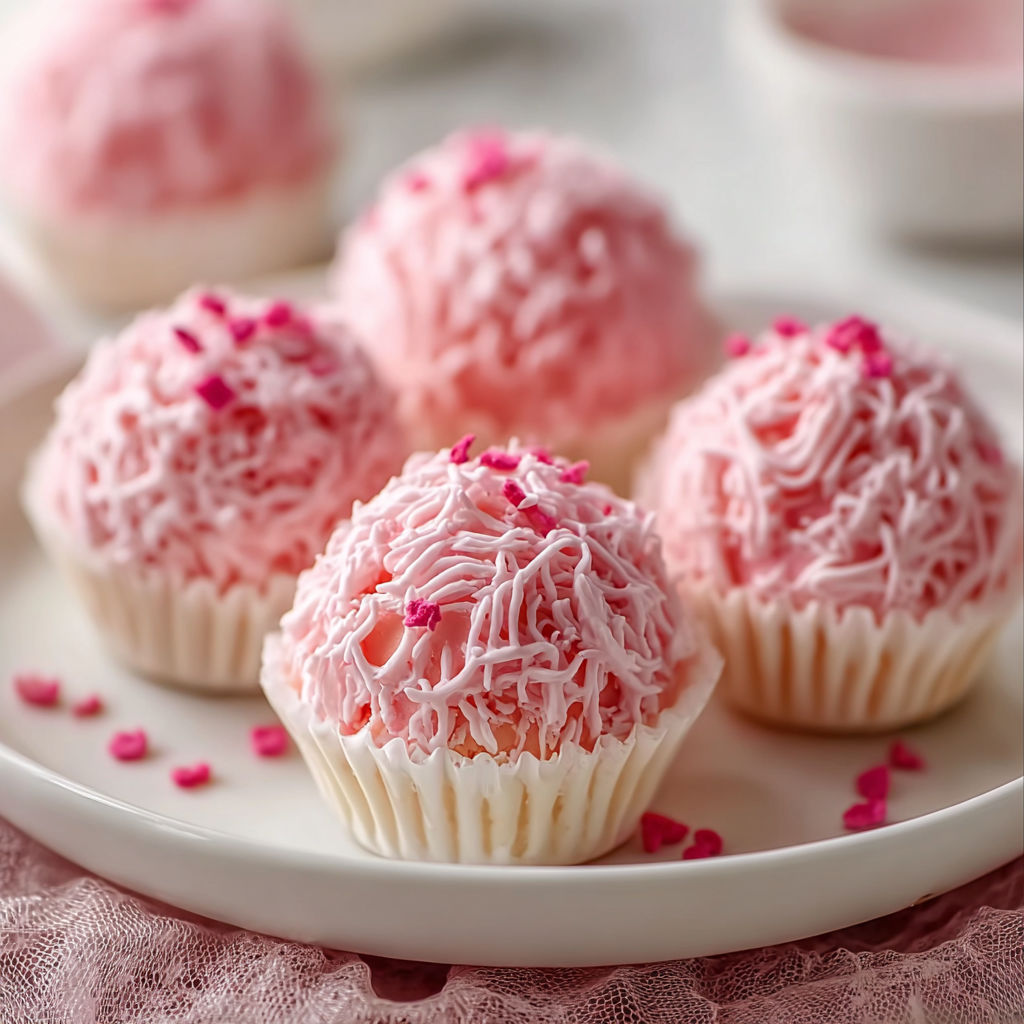
- 1 cup whipped cream: Adds a beautiful finish and extra lightness to each bite. You can make your own or use quality store bought.
- Sprinkles optional: For extra color and a festive touch that makes these bites even more party ready.
How to Make It
- Prepare the Crust Base:
- Combine the graham cracker crumbs with the granulated sugar in a medium mixing bowl and stir together using a fork until evenly distributed. The sugar should be completely incorporated throughout the crumbs with no clumps remaining. Pour the melted butter over the crumb mixture and stir vigorously for about one minute until every crumb is coated and the mixture resembles wet sand. You'll know it's ready when you can squeeze a handful and it holds together without crumbling apart. Press about one tablespoon of this mixture firmly into the bottom of each cup in a mini muffin tin or small silicone molds. Use the back of a spoon or a small flat bottomed glass to really pack it down creating a solid foundation. Place the tin in the refrigerator while you prepare the filling.
- Create the Creamy Filling:
- Take your room temperature cream cheese and place it in a large mixing bowl. Using an electric mixer on medium speed, beat the cream cheese for approximately two minutes until it becomes completely smooth and fluffy with no lumps visible. Scrape down the sides of the bowl with a spatula to ensure everything gets incorporated. Add the powdered sugar and continue beating for another minute until the mixture is silky and the sugar has fully dissolved. The texture should be noticeably lighter in color and airy. Pour in the vanilla extract and mix on low speed for thirty seconds until combined. The vanilla will perfume the entire mixture with its sweet aroma.
- Whip and Color the Cream:
- In a separate chilled mixing bowl, pour the cold heavy cream and begin whipping on low speed gradually increasing to high. Watch carefully as the cream transforms from liquid to soft peaks over about three to four minutes. You want stiff peaks that hold their shape when you lift the beaters but aren't grainy or separated. Add the pink food coloring one drop at a time while the mixer runs on low speed. Start with just a few drops and add more until you achieve your desired shade of pink. I prefer a soft pastel pink but you can go bolder for a more dramatic look. Once the color is perfect, gently fold half of the whipped cream into the cream cheese mixture using a rubber spatula. Use broad sweeping motions from the bottom of the bowl up and over to maintain as much airiness as possible. Add the remaining whipped cream and continue folding until no white streaks remain and the mixture is uniformly pink and cloud like.
- Assemble the Bites:
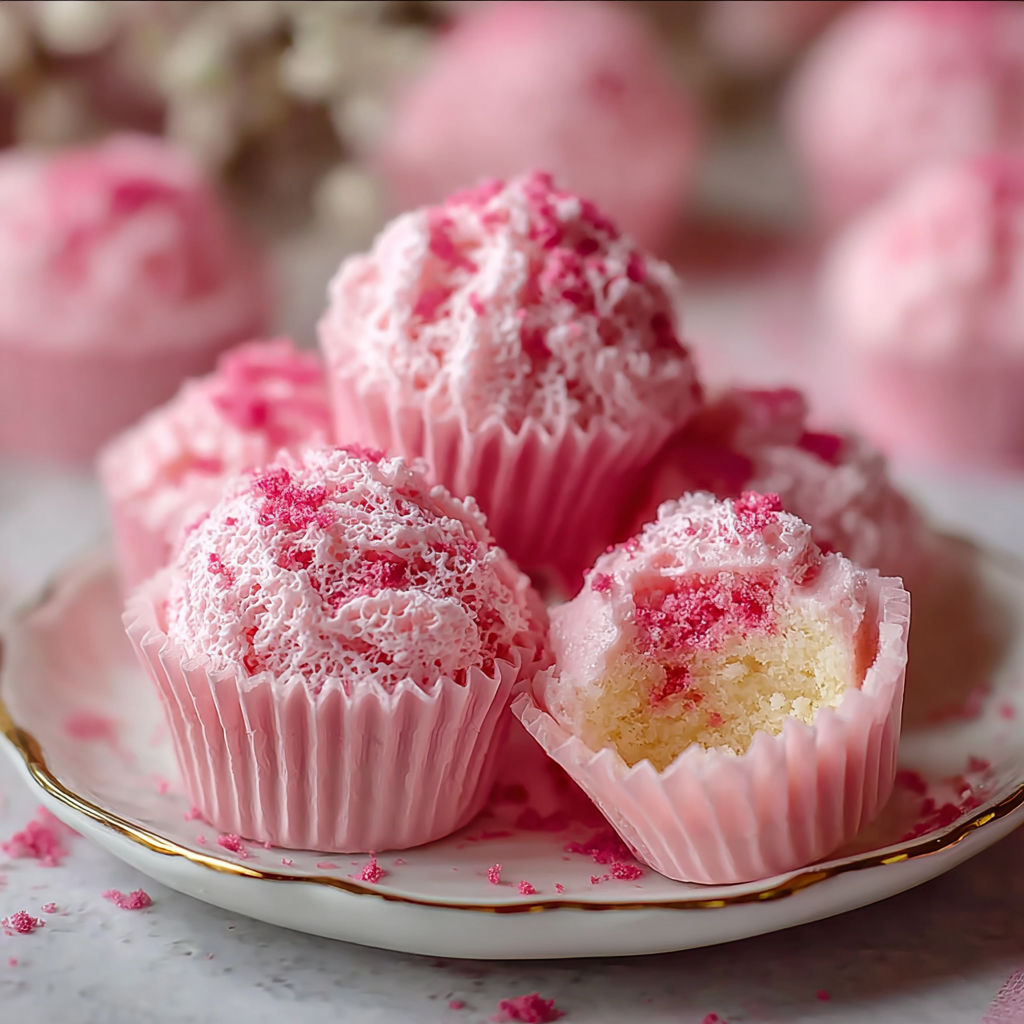
- Remove your prepared crusts from the refrigerator. Using a piping bag fitted with a large star tip or simply a spoon, fill each crust lined cup with the pink cheesecake filling. Pipe or spoon generously until the filling reaches just below the rim of each cup creating a nice rounded top. If using a piping bag, hold it vertically and apply steady pressure for the prettiest swirls. Smooth the tops gently with an offset spatula if you prefer a clean finish. Top each bite with a small dollop of the reserved whipped cream creating a pretty contrast against the pink filling. Finish with a sprinkle of colorful sprinkles if desired, letting them cascade naturally over the cream for that celebratory look.
- Chill and Set:
- Transfer the entire muffin tin or mold tray carefully to the refrigerator making sure it sits level so the filling doesn't slide. Allow the bites to chill for at least two hours but preferably four hours for the firmest texture. The filling will set up beautifully during this time transforming from soft and pipeable to sliceable and creamy. When ready to serve, run a thin knife around the edge of each bite if using a muffin tin, or simply pop them out if using silicone molds. They should release easily and hold their shape perfectly.
The cream cheese is truly the star ingredient here and I always splurge on a quality brand because it makes such a difference in the final texture. I remember the first time I tried making these with low fat cream cheese and the results were disappointing and grainy. Now I only use full fat and always let it sit on the counter for at least thirty minutes before starting. The way these little bites brighten up any dessert table never fails to make me smile.
Flavor Boosters
You can easily adapt this recipe based on what you have in your pantry or dietary preferences. Instead of graham crackers, try using vanilla wafer cookies, chocolate cookie crumbs, or even crushed pretzels for a sweet and salty twist. The butter can be replaced with coconut oil for a dairy free crust though the flavor will be slightly different. For the filling, you can substitute the cream cheese with an equal amount of mascarpone for an even richer Italian style treat or use dairy free cream cheese alternatives that are now widely available. The heavy cream whips up best but you could use coconut cream that's been chilled overnight for a non dairy version. Natural food coloring from beet juice or freeze dried raspberry powder gives a beautiful pink hue without artificial dyes though you'll need to experiment with quantities. Reduce the sugar by a quarter if you prefer less sweet desserts. Add a tablespoon of lemon juice to the filling for a tangy cheesecake flavor. Mix mini chocolate chips into the crust for extra indulgence.
Serving Suggestions
These bites look stunning arranged on a tiered dessert stand for special occasions or simply plated on a pretty serving platter. I love garnishing the platter with fresh raspberries or strawberries that echo the pink color and add a pop of freshness. For an extra elegant touch, drizzle melted white chocolate over the tops in a zigzag pattern or dust them lightly with edible glitter. They pair wonderfully with champagne or sparkling pink lemonade for brunch gatherings. During the holidays, I sometimes add a tiny mint leaf on top for a festive look. You can also serve them in individual paper cups for easy grab and go treats at casual parties or picnics.
Creative Twists
While the pink color makes these perfect for Valentine's Day, baby showers, and spring celebrations, you can easily adapt the color scheme for any season or holiday. Use orange food coloring and add a teaspoon of pumpkin pie spice for fall gatherings. Switch to red and green for Christmas or pastel colors for Easter. During summer, I sometimes fold in a tablespoon of strawberry puree along with the food coloring for natural fruit flavor and color. For winter holidays, try adding peppermint extract instead of vanilla and use white chocolate shavings on top. The base recipe is so versatile that you can match it to any theme or celebration throughout the entire year. Keep the crust neutral and change only the filling color for easiest adaptation. Add freeze dried fruit powder for natural color and complementary flavor. Use themed sprinkles and toppings to match your specific occasion.
These no bake pink velvet cheesecake bites are easy to adapt for any occasion and always impress a crowd. Make a batch, share with loved ones, and watch how quickly they vanish!
Common Questions About This Recipe
- → How do I achieve the signature pink color?
The vibrant pink hue comes from adding food coloring to the cream cheese mixture. Adjust the amount for a lighter or deeper shade.
- → Can I substitute the graham cracker base?
Yes, you can use crushed cookies, digestive biscuits, or vanilla wafers as alternative bases for a different flavor and texture.
- → How long should the bites chill before serving?
Allow the bites to chill for 30 to 45 minutes, ensuring the filling sets and flavors meld for best results.
- → Is it possible to prepare these bites ahead of time?
Absolutely. Prepare and refrigerate the bites a day ahead, then top with whipped cream and sprinkles shortly before serving.
- → Are there tips to ensure a smooth cream cheese filling?
Make sure cream cheese is at room temperature before mixing and beat until smooth to prevent lumps, ensuring a creamy texture.