
 Pin
Pin
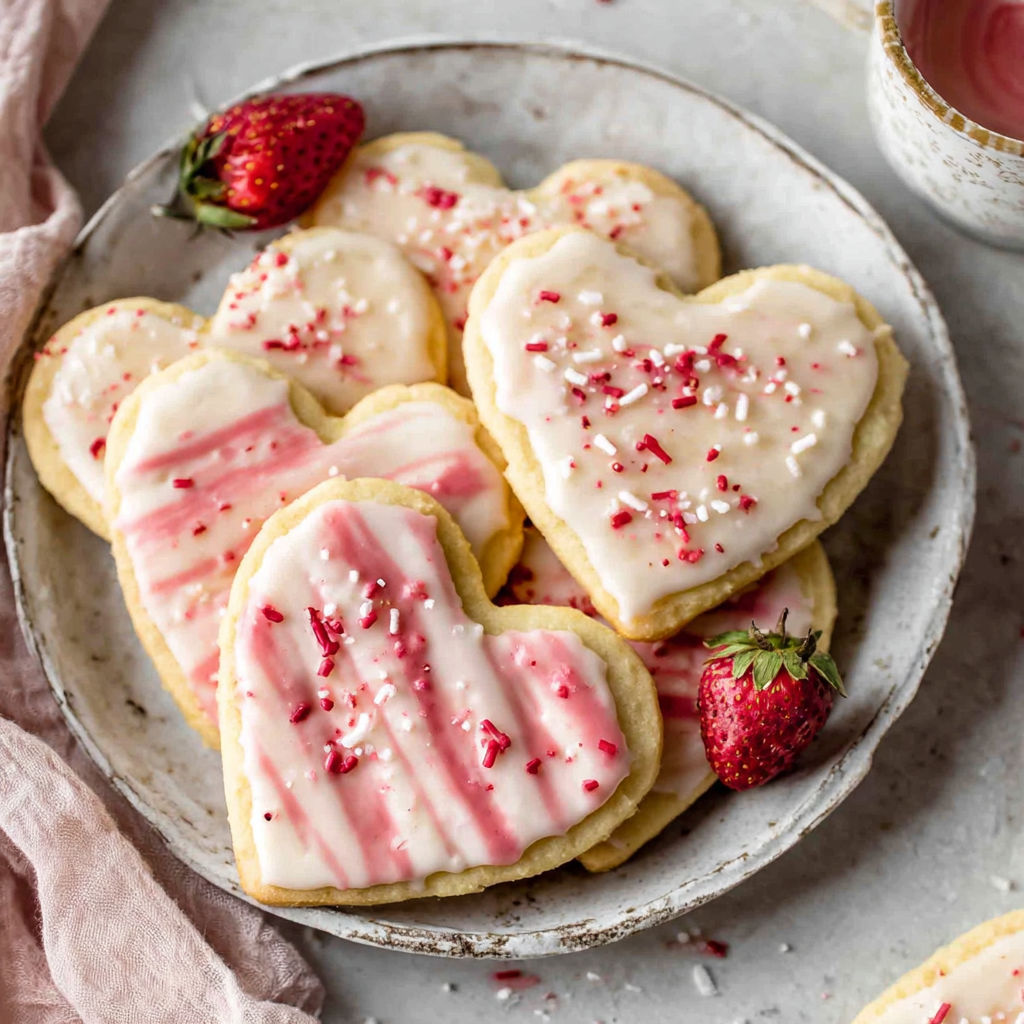
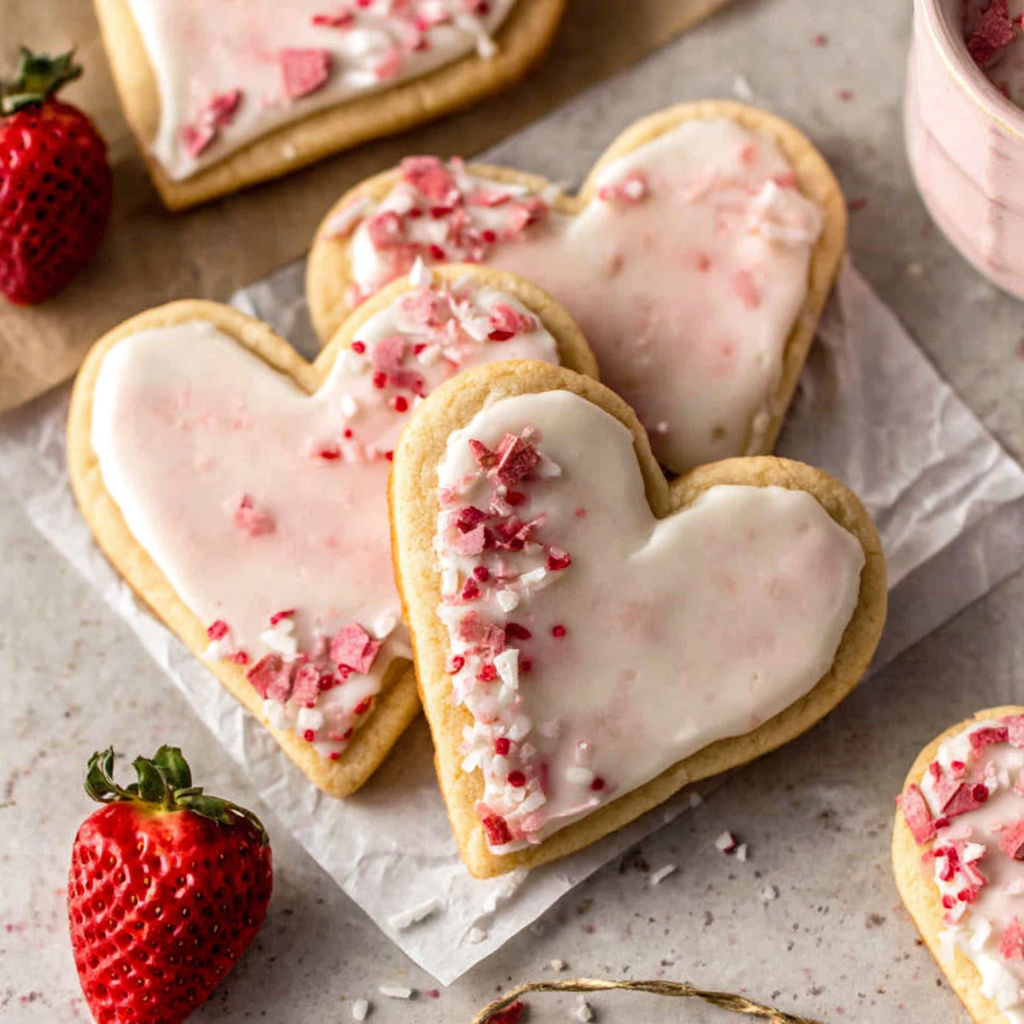
These heart-shaped strawberry shortbread cookies have become my Valentine's Day tradition, though honestly, my family requests them year-round. The buttery, melt-in-your-mouth texture combined with sweet strawberry jam and a delicate pink glaze makes them irresistible for any celebration or just because you want to share something made with love.
I started making these for a school bake sale three years ago, and they sold out within minutes. Now I make triple batches because one batch simply disappears too quickly when my kids come home from school and spot that pretty pink glaze.
Gather Your Ingredients
- Unsalted butter: At room temperature creates the perfect tender crumb. Look for European style butter with higher fat content if you want extra richness. The butter should be soft enough to leave an indent when pressed but not greasy or melted.
- Caster sugar: Dissolves beautifully into the butter for a finer texture than granulated sugar. If you only have regular sugar, pulse it in a food processor for 10 seconds to make it finer.
- Vanilla extract: Adds warmth and depth. Pure vanilla makes a noticeable difference here since these cookies have such a delicate flavor profile.
- Plain flour or all-purpose flour: Provides structure without making the cookies tough. Measure by spooning into your cup and leveling off for accuracy.
- Fine salt: Enhances all the other flavors. Table salt works perfectly here since you want it to dissolve completely into the dough.
- Powdered icing sugar or confectioners' sugar: Creates a smooth glaze that sets beautifully. Make sure it's fresh and lump free for the best results.
- Fresh strawberry puree: Gives the glaze its gorgeous natural pink color and subtle fruit flavor. Use ripe strawberries for the sweetest taste and brightest color.
- Melted butter: In the glaze adds richness and helps it set with a slight sheen.
- Milk: Thins the glaze to the perfect consistency for dipping or drizzling.
- Strawberry jam: Becomes the sweet filling that makes these cookies extra special. Choose a good quality jam with visible fruit pieces for the best flavor.
How to Make It
- Cream the Butter and Sugar
- Place your room temperature butter in a large mixing bowl with the caster sugar. Using an electric mixer or wooden spoon, beat them together for about 3 to 4 minutes until the mixture becomes pale, fluffy, and increases in volume. You want to see the color lighten from yellow to almost white as air incorporates into the butter. This creaming process is crucial because it creates tiny air pockets that make your cookies tender rather than dense. Stop halfway through to scrape down the sides of the bowl so everything mixes evenly.
- Add Vanilla and Combine
- Pour in your vanilla extract and beat for another 30 seconds until it's fully incorporated throughout the butter mixture. The vanilla should be evenly distributed so every bite of cookie has that lovely flavor.
- Mix in Dry Ingredients
- Sift your plain flour and fine salt together, then add them to the butter mixture. Use a wooden spoon or spatula to fold and stir gently until just combined. The dough will look crumbly at first but should come together into a soft ball as you continue mixing. Avoid overmixing once the flour is added because this develops gluten and makes cookies tough instead of tender. The dough is ready when there are no more streaks of flour visible and it holds together when pressed.
- Roll Out the Dough
- Lightly flour your work surface and rolling pin. Place the dough ball on the floured surface and press it down gently with your hands to flatten it slightly. Roll the dough out to about 5 millimeters or just under a quarter inch thickness. Roll from the center outward, rotating the dough a quarter turn after each roll to maintain an even thickness. If the dough sticks, dust a tiny bit more flour underneath. The thickness matters here because too thin and the cookies will be crispy rather than that perfect shortbread texture, too thick and they won't bake evenly.
- Cut Heart Shapes
- Use a heart shaped cookie cutter to cut out as many shapes as possible from the rolled dough. Press the cutter straight down firmly and lift straight up to get clean edges. For half of your hearts, use a smaller heart cutter to cut out the centers, creating a window that will show the jam. These will be your top cookies. Place all cut cookies onto a baking sheet lined with parchment paper, spacing them about 2 centimeters apart. Gather the scraps, press them together gently, roll out again, and cut more hearts until you've used all the dough.
- Bake the Cookies
- Preheat your oven to 160 degrees Celsius or 320 degrees Fahrenheit. Slide your baking sheet into the center of the oven and bake for 12 to 15 minutes. Watch them carefully because shortbread should stay pale. You're looking for the edges to just barely start turning a light golden color while the centers remain almost white. The cookies will still feel slightly soft when you take them out but will firm up as they cool. Overbaking will make them dry instead of buttery and tender. Remove from the oven and let them cool on the baking sheet for 5 minutes before transferring to a wire cooling rack.
- Prepare the Strawberry Glaze
- While the cookies cool completely, make your glaze. Hull two large ripe strawberries and mash them thoroughly with a fork until you have a smooth puree with no large chunks. Press the mashed berries through a fine mesh strainer if you want a completely smooth glaze without seeds. In a medium bowl, sift the powdered icing sugar to remove any lumps. Add the strawberry puree, melted butter, and milk. Whisk together until completely smooth. The consistency should be thick enough to coat the back of a spoon but thin enough to drip slowly. If it's too thick, add milk half a teaspoon at a time. If too thin, add more icing sugar a tablespoon at a time.
- Assemble the Cookie Sandwiches
- Arrange all the solid heart cookies flat side up on your work surface. These are your bottoms. Spoon about a teaspoon of strawberry jam onto the center of each bottom cookie. Don't spread it all the way to the edges because it will spread when you press the top on. Take each cookie with the cut out center and dip the top side into your strawberry glaze, letting the excess drip back into the bowl. Place the glazed cookie on top of a jam covered bottom cookie, pressing down very gently so the jam spreads to peek through the heart window but doesn't squish out the sides. Repeat until all cookies are sandwiched together.
- Let the Glaze Set
- Allow the assembled cookies to sit at room temperature for about 30 minutes until the glaze sets and is no longer sticky to the touch. The glaze will dry to a beautiful matte finish with just a hint of shine. During this time, the jam and cookies will settle together for easier eating.

The strawberry puree in the glaze is my favorite part because it gives such a natural pretty pink color without any food dye. I'll never forget the first time I made these with my daughter for her kindergarten class party. She was so proud carrying that box of pink hearts, and her teacher still asks me for the recipe every February. The look on children's faces when they see that jewel toned jam peeking through the heart window is absolutely priceless.
Flavor Boosters
If you can't find caster sugar, regular granulated sugar works fine though the texture will be slightly less refined. You can also use powdered sugar in place of caster for an even more delicate crumb. For the jam filling, feel free to use raspberry, apricot, or mixed berry jam instead of strawberry. Each creates a different flavor profile but all taste wonderful.
If strawberries aren't in season, frozen strawberries work perfectly for the glaze puree. Thaw them first and drain excess liquid before mashing. You can also substitute freeze dried strawberries ground into powder mixed with a tiny bit of water. For a dairy free version, use vegan butter in both the cookies and glaze, and substitute the milk with almond or oat milk.
Salted butter can replace unsalted butter if needed but omit the additional salt from the recipe. The cookies will have a slightly more pronounced savory note that some people actually prefer with the sweet jam and glaze.
Serving Suggestions
These cookies are stunning on a white serving platter surrounded by fresh strawberries and small flowers for a tea party or bridal shower. Pair them with hot tea, coffee, or a glass of cold milk. They're also beautiful individually wrapped in clear cellophane bags tied with ribbon as party favors or Valentine's gifts.
For an extra special presentation, dust the finished cookies with a light sprinkle of edible glitter or pearl dust. You can also drizzle melted white or dark chocolate over the glaze once it's set for added elegance. Stack them in a vintage jar or tin for a charming homemade gift.
Serve alongside fresh whipped cream and sliced strawberries for a simple but impressive dessert. The buttery shortbread pairs wonderfully with the lightness of whipped cream.
Kids love decorating these cookies themselves so set up a cookie decorating station with the baked hearts, jam, glaze, and sprinkles for a fun activity.
They're also perfect for picnics since they travel well without refrigeration.
Creative Twists
Shortbread originated in Scotland and was traditionally made with just three ingredients butter, sugar, and flour. The technique of creaming butter and sugar was perfected by Scottish bakers who understood that the high butter content created that signature melt in your mouth texture. Shortbread was considered a luxury item because butter was expensive, so it was reserved for special occasions like weddings and Christmas.
The sandwich cookie concept likely came from Victorian England where elaborate tea time treats were fashionable. Combining Scottish shortbread tradition with fruit preserves and pretty shapes created an elegant cookie perfect for afternoon tea. Heart shapes have long been associated with love and celebration, making these particular cookies ideal for Valentine's Day, weddings, and anniversaries.
Today, shortbread remains a beloved classic worldwide with countless variations. This strawberry version adds a modern fruity twist while honoring the traditional buttery base that makes shortbread so special.
During summer, use fresh local strawberries at their peak for the most vibrant color and flavor in your glaze and jam. You can even make your own quick strawberry jam with fresh berries, sugar, and lemon juice for an completely from scratch version. In autumn, switch to apple butter or pumpkin butter for the filling and add a pinch of cinnamon to the dough.
Winter is perfect for raspberry or cranberry jam with a hint of orange zest added to the glaze. The red colors are festive for Christmas and Valentine's Day. Spring calls for apricot or peach jam with a touch of almond extract in the cookies. You could also use different cookie cutter shapes to match the season like flowers for spring, stars for Christmas, or leaves for autumn.
The beauty of this recipe is its versatility. The basic shortbread dough is a blank canvas for your creativity throughout the year.
Make the dough ahead and refrigerate up to 2 days before rolling and baking for easier meal planning.
Toast your cut out heart centers separately and serve them as bonus cookies or crush them over ice cream.
Warm the jam slightly before spreading for easier assembly and better distribution.
Trust me, making this recipe a few times will teach you exactly what consistency works best for your dipping style, and then it becomes second nature every time you make these beautiful cookies.
Common Questions About This Recipe
- → How do I keep the heart shapes from spreading?
Chill the dough before cutting and baking. This helps the cookies hold their shape and results in clean edges.
- → Can I use store-bought jam instead of homemade puree?
Yes, you can use store-bought strawberry jam for filling, but using fresh strawberry puree in the dough enhances natural flavor.
- → What’s the texture of these cookies?
They are tender and crumbly, with the classic melt-in-the-mouth texture of shortbread and a fruity, slightly chewy center from the jam.
- → Can I freeze the dough or baked cookies?
Yes. Freeze the dough after shaping for up to one month, or store baked cookies in an airtight container for up to a week.
- → How do I know when the cookies are done?
They are ready when edges turn just golden and the tops remain pale. Overbaking can make them dry, so keep a close eye on them.