
 Pin
Pin
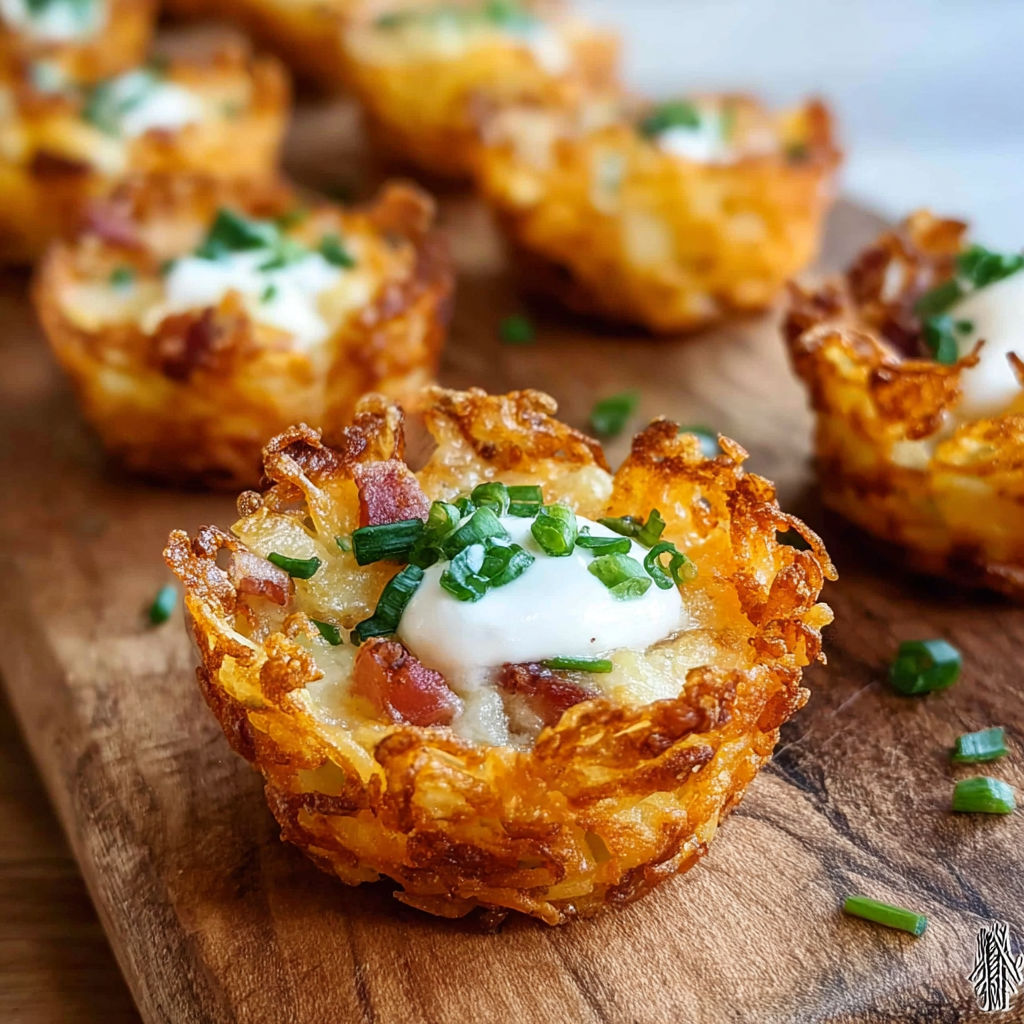
These tater tot appetizer cups have saved me more times than I can count when unexpected guests show up or when I need to bring something impressive to a potluck without spending hours in the kitchen. The genius lies in transforming humble frozen tater tots into crispy little vessels that cradle melted cheese and all your favorite loaded potato toppings.
I stumbled upon this method years ago when trying to make appetizers for my daughter's birthday party, and the kids went absolutely wild for them. Now they're my secret weapon for game day gatherings and holiday parties alike.
Gather Your Ingredients
- 48 to 60 frozen tater tots from a 16 ounce bag: The foundation of this entire recipe. Look for tots that are uniform in size so they bake evenly. I prefer the classic golden rounds but have successfully used the extra crispy variety when that's what I had available.
- Cooking spray: Essential for both the muffin pan and the glass you'll use for shaping. Without this, the potatoes will stick and your beautiful cups will fall apart when you try to remove them.
- 1 cup shredded cheddar cheese: Sharp cheddar gives the best flavor punch but mild works if you're serving picky eaters. Freshly shredded melts better than pre-shredded because it doesn't contain anti-caking agents.
- 1/2 cup sour cream for topping: Full fat sour cream has the best texture and won't get watery like light versions can. Let it sit at room temperature while the cups bake so it's easy to dollop.
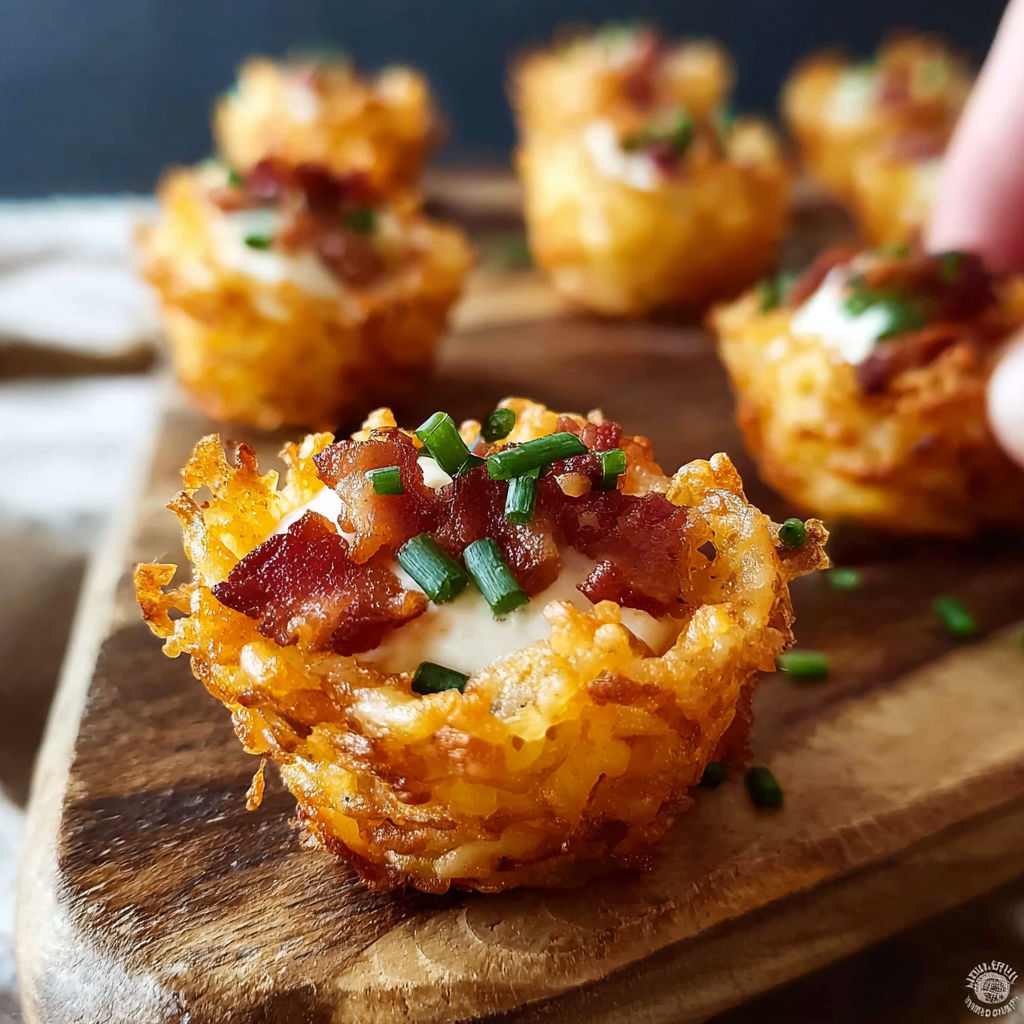
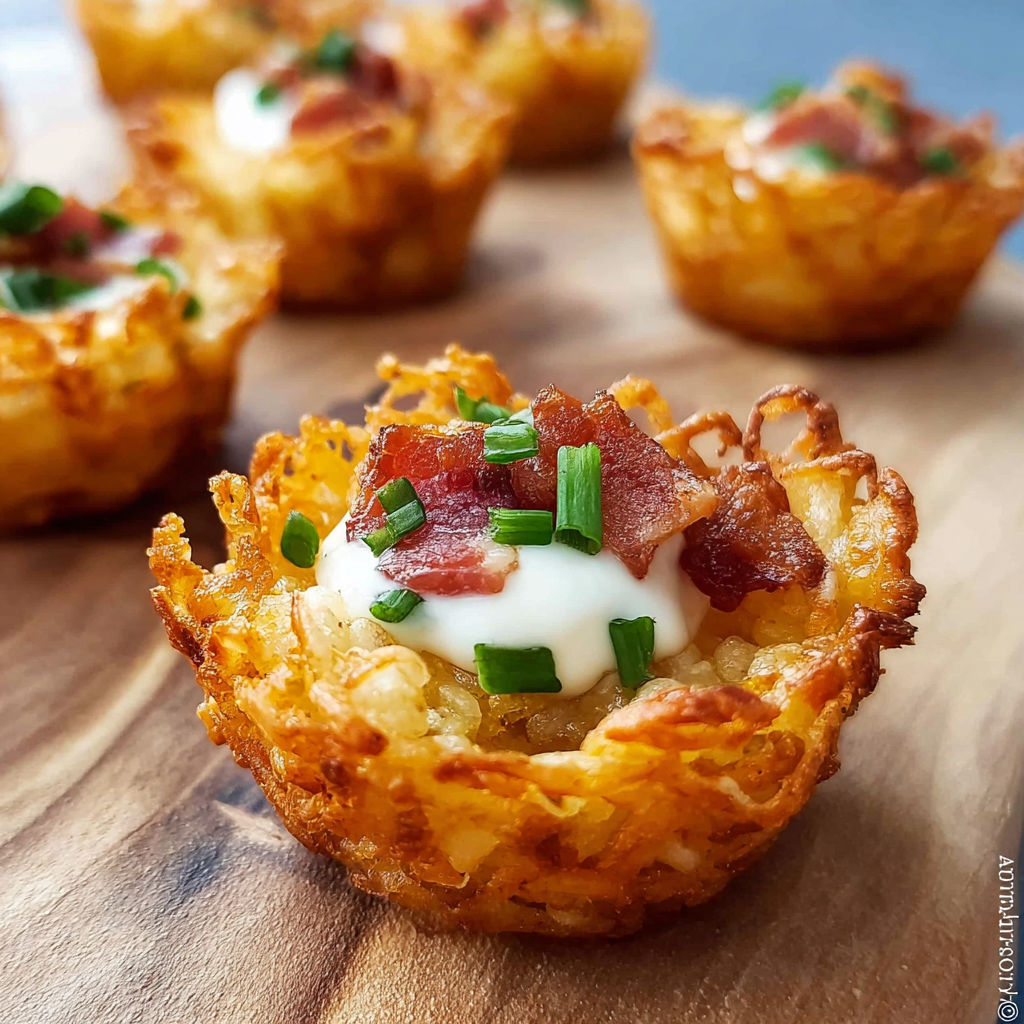
- 4 slices bacon cooked and crumbled: The smokiness is irreplaceable but turkey bacon works in a pinch. I cook mine until extra crispy so it stays crunchy even after sitting on the warm potato cups.
- 2 green onions sliced using just the green parts: These add a fresh pop of color and mild onion flavor. The white parts are too strong and can overpower the other flavors.
How to Make It
- Preheat Your Oven Properly:
- Set your oven to 450 degrees Fahrenheit and allow it to fully preheat for at least 15 minutes. While the oven heats, generously spray your muffin pan with cooking spray, making sure to coat the bottom and sides of each cup completely.
- Arrange the Tater Tots:
- For a mini muffin pan, nestle 2 to 3 tater tots into each cup depending on the exact size of your pan. For a regular sized muffin pan, you'll need 4 to 5 tots per cup. Press them down gently so they touch the bottom but don't smash them. The tots should fit snugly but not be jammed in so tight that there's no room for them to spread slightly as they begin to soften.
- Initial Baking Phase:
- Place your prepared muffin pan on the bottom rack of the oven. Bake for exactly 10 minutes. During this time, the tots will start to soften and their edges will begin turning golden. Remove the pan carefully as it will be very hot.
- Shape the Potato Cups:
- Spray the bottom of a shot glass or small juice glass liberally with cooking spray. Working quickly while the tots are still hot and pliable, press the glass straight down into the center of the softened tots in one muffin cup. Twist the glass gently back and forth while pressing down, which pushes the potato up the sides of the muffin cup to form walls. Lift the glass straight up and move to the next cup. Respray the glass every few cups to prevent sticking. If the tots start to cool and become difficult to shape, pop the pan back in the oven for a minute or two to soften them again.
- Second Baking for Crispiness:
- Return the shaped cups to the bottom oven rack and bake for an additional 15 minutes. Watch them carefully during the last few minutes. You want a deep golden brown color on the edges and visible crispiness on the potato surfaces.
- Add the Cheese:
- Remove the pan from the oven once more. Sprinkle about 1 tablespoon of shredded cheese into each potato cup, making sure some cheese touches the bottom and sides. Return to the oven and bake for just 4 to 5 minutes until the cheese is fully melted and slightly bubbly. Don't overbake at this stage.
- Cool and Remove from Pan:
- Transfer the muffin pan to a cooling rack and let the cups sit for 5 full minutes. After 5 minutes, use a small offset spatula or butter knife to gently loosen each cup from the pan and transfer to your serving platter.
- Top and Serve:
- Add a small dollop of sour cream to each cup, then sprinkle with crumbled bacon and sliced green onions. Serve while still warm for the best texture contrast between the crispy potato cups and creamy toppings.
I'll never forget the first time I brought these to our neighborhood block party. Three different people asked for the recipe before I even made it back to my spot at the table. The best part is how forgiving they are to make. Even if your potato cups aren't perfectly shaped, they still taste incredible and look impressive on the serving platter.
Flavor Boosters
My absolute favorite part of this recipe is the bacon. I've experimented with every type from thick cut applewood smoked to center cut, and I keep coming back to regular sliced bacon cooked until it's almost burned. That extra crispiness adds a textural element that makes each bite more interesting. Watching people's faces light up when they bite into that crispy potato shell and hit the creamy, cheesy, smoky center never gets old.
Serving Suggestions
These cups work as appetizers, side dishes, or even a fun breakfast option depending on how you style them. For game day spreads, arrange them on a large board surrounded by extra toppings in small bowls. At brunch, serve with a simple green salad. Great as sides for burgers or steak, or in lunchboxes with toppings on the side. For elegant events, make mini cups garnished with microgreens or top with smoked salmon and crème fraîche for a latke inspired bite.
Creative Twists
Try filling the cups with scrambled eggs and sausage for breakfast, seasoned ground beef and salsa for taco night, or black beans and pepper jack cheese for vegetarians. Caramelized onions with gruyere make a decadent holiday twist. Use sweet potato tots for color and pair with pulled pork and coleslaw. Gouda or blue cheese bring bolder flavor. Greek yogurt can swap for the sour cream and smoked paprika delivers a vegetarian smoky kick. Avoid substituting with hashbrowns, as they don't hold together the same.
Once you master these tater tot cups, you'll turn any party into a smash. They're the kind of appetizer everyone remembers and requests again and again.
Common Questions About This Recipe
- → How do you make the tater tot cups hold their shape?
After baking the tater tots in muffin pans, use a small glass to press and mold them into cups. This method ensures a sturdy base for your toppings.
- → Can these appetizer cups be made ahead of time?
You can prepare the tater tot cups in advance and reheat before serving. Add fresh toppings like sour cream and green onions right before serving for best results.
- → What are alternative toppings for tater tot cups?
Try adding chopped chives, shredded cheddar, jalapeños, or even a dollop of salsa to customize the flavor to your preference.
- → Are these cups suitable for parties?
Yes, their bite-sized presentation and simple serving make them ideal for parties, potlucks, or game day snacks.
- → Can you use homemade tater tots instead of frozen?
Homemade tater tots can work well if they're shaped tightly and baked until very crispy to ensure the cups hold together.