
 Pin
Pin
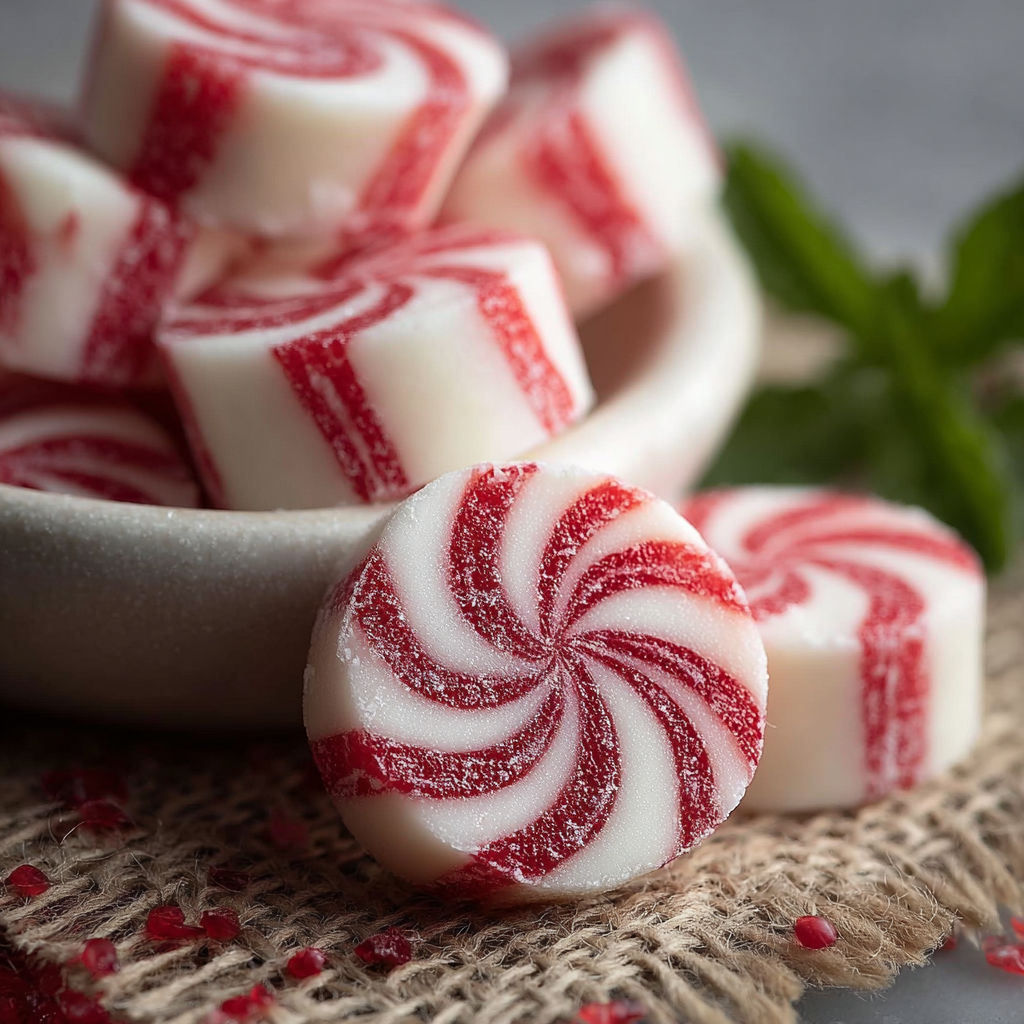
These buttery soft Christmas peppermints are the candies I always sneak onto holiday dessert tables just because I know they will disappear before dinner is done. They dissolve in your mouth with a hit of cool peppermint and a sparkly sweet finish. Brightly colored and perfectly shaped for gift boxes or to showcase in pretty jars these are a homemade treat that never gets old during the holidays.
My favorite Christmas memories all include these mints lined up on fancy trays my grandmother would place out. I started making them myself as an easy edible gift for teachers and was surprised how quickly they became a tradition with my own kids.
Gather Your Ingredients
- Powdered sugar: Gives the unique melt in your mouth texture so sift it well for best results and be sure to have extra for dusting and rolling
- Sweetened condensed milk: Brings creaminess and just the right amount of richness choose one with the freshest flavor for best candy
- Peppermint extract: Is the classic flavor you need go for pure peppermint instead of imitation for that clean fresh scent
- Food coloring: Makes these festive so pick holiday reds and greens using gel for a vibrant shade that does not thin out your dough
- Granulated sugar: Is the final touch for a sparkling shell and helps keep the mints from sticking together use a fine grain if possible
How to Make It
- Make the Base Dough:
- In a large bowl combine your sweetened condensed milk peppermint extract and about two cups of the powdered sugar. Use a sturdy spoon or a soft spatula and stir until the mixture is fully smooth and no streaks remain. This is your flavor-packed foundation and the smoother it gets the better the finished mints.
- Finish Mixing the Dough:
- Start adding the remaining powdered sugar little by little stirring with each addition. Switch to your hands as soon as it gets too stiff to stir easily. Knead just enough to bring it together into a soft dough that feels like playdough and does not stick to the bowl or your hands. If it feels sticky sprinkle in another spoonful of powdered sugar.
- Color and Knead:
- Separate your dough if using more than one color. Add just a drop or two of food coloring to each piece. Use gloves to keep hands clean and knead until the color looks even throughout with no streaks or patches.
- Shape and Dust:
- Clean your work surface and dust it generously with powdered sugar. Gently roll each section of dough into ropes about half an inch thick. This helps shape the candies evenly. If the dough sticks just dust with a bit more powdered sugar.
- Cut and Roll:
- Use a sharp knife or a bench scraper to cut the ropes into small pillow shapes or pinch off bits and roll into balls. Try to keep the sizes uniform so they dry evenly and look great on a tray.
- Sparkle and Finish:
- Pour granulated sugar onto a plate and roll each mint to coat it completely. This gives them a beautiful sparkly finish and keeps them from sticking once stored.
- Dry and Set:
- Arrange your shaped mints on a tray lined with parchment paper making sure they are not touching. Leave out for at least an hour to form a delicate crust on the outside while the inside remains soft and creamy.

The sweetened condensed milk is the secret to how soft these stay inside and I still remember my kids’ faces when they first got to knead the brilliantly colored dough. Family candy making afternoons always get a little messy but that is part of the holiday fun.
Flavor Boosters
You can swap peppermint for vanilla or almond extract for a totally different flavor twist. Gel food coloring gives brighter results without thinning the dough but any coloring will work in a pinch. Ensure you use full fat sweetened condensed milk for optimal texture if using a lighter version your dough may feel stickier.
Serving Suggestions
I like piling them in glass jars with red and green ribbons or lining them on cookie platters alongside chocolate bark and sugar cookies. They also look beautiful on dessert boards for a festive pop of color.
Creative Twists
Mints like these have been holiday favorites in the United States for decades often appearing alongside fudge and caramel on sweets trays. The tradition of gifting homemade candy runs deep and these little mints always feel nostalgic to me thanks to their classic flavor and cheery look. Out of the holiday season try pastels for baby showers or wedding favors. Add lemon or orange flavoring and soft spring colors for Easter baskets. Blue and silver look stunning for winter parties or Hanukkah.

I have had friends text me weeks after Christmas asking if I have any extra tucked away because they cannot stop thinking about these. The first time my son brought a batch for his class party the teacher told me every last one vanished before lunch.
Common Questions About This Recipe
- → How do I keep the peppermint dough from sticking?
Dust your work surface and hands generously with powdered sugar to prevent sticking when shaping the dough.
- → Can I use different food colorings?
Yes, feel free to use any festive shades such as red, green, or white to suit the holiday mood.
- → What’s the best way to store these candies?
Store them in an airtight container at room temperature. They stay fresh for up to two weeks.
- → Can I shape the candies differently?
Absolutely. Roll into ropes, cut pieces, or form small balls for variety and visual appeal.
- → Is it necessary to use granulated sugar for rolling?
Rolling in granulated sugar adds sparkle and keeps each piece from sticking—it's recommended for best results.