
 Pin
Pin
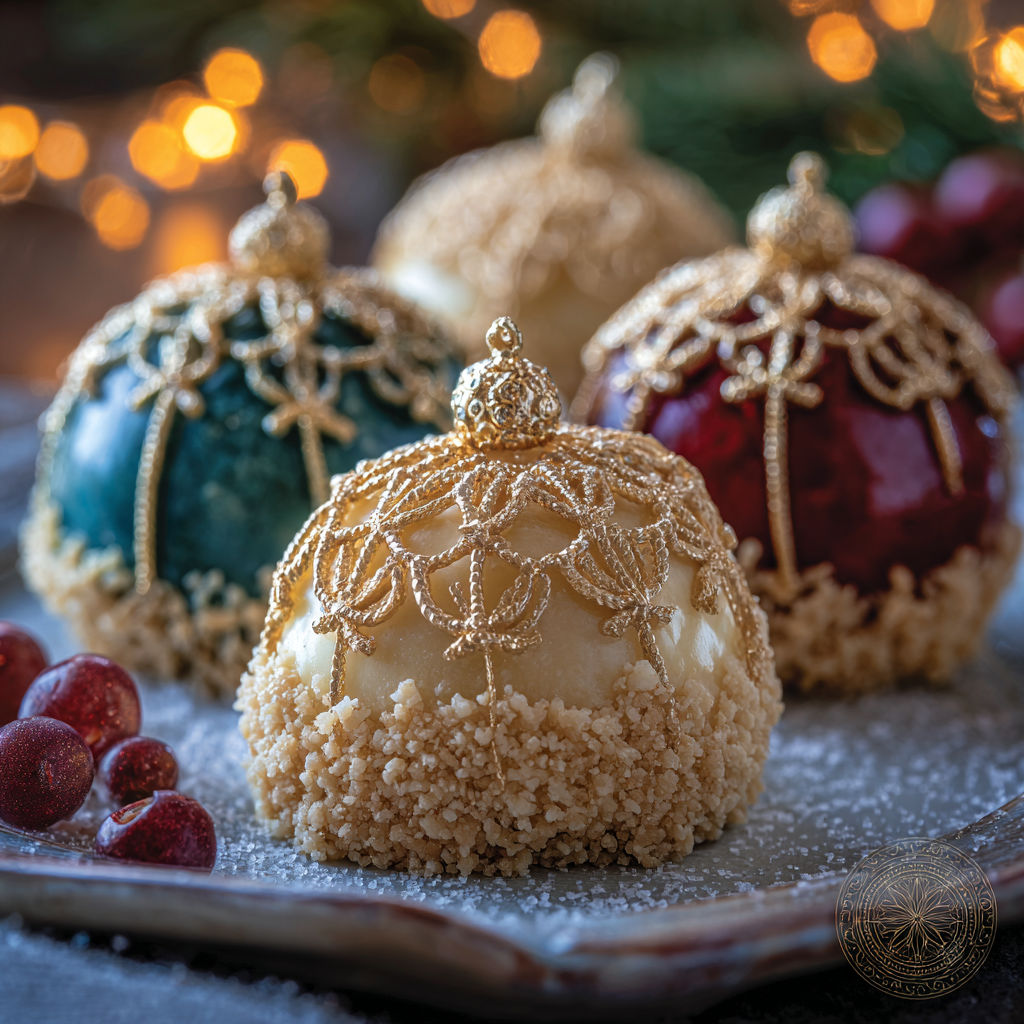
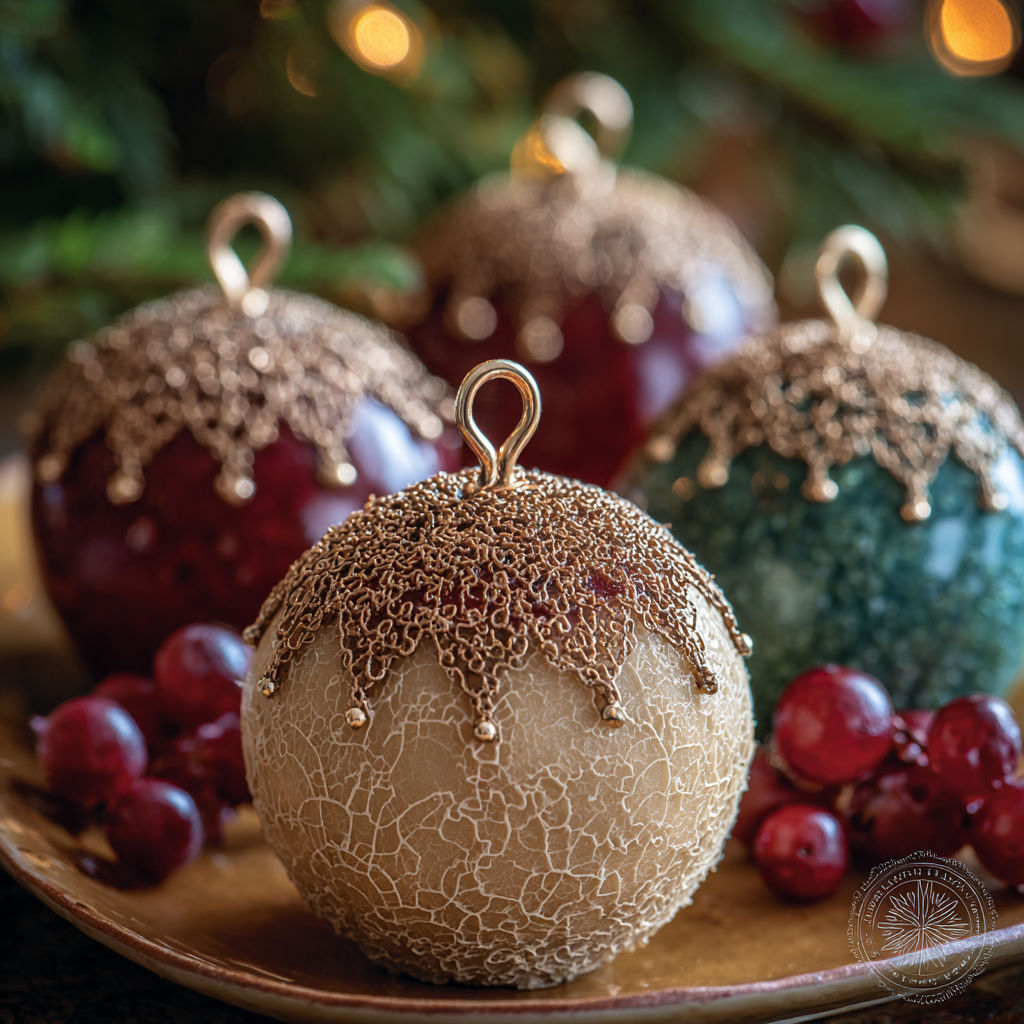
These Christmas Ornament Mousse Balls are the ultimate holiday showstopper—a playful, glossy dessert inspired by cherished family traditions. Each bright, mirror-glazed mousse ball is filled with airy chocolate, a surprise center, and finished to shimmer like the ornaments from my grandmother’s tree. When you serve these, the table lights up with color and joy, making them the perfect finale for festive gatherings.
I first created these when I wanted a dessert as magical as my Mamaw’s tree. Since then, every Christmas brings a new color, filling, and another round of “wow” from friends as I unveil these edible ornaments.
Gather Your Ingredients
- Heavy cream: high fat content makes mousse extra silky and stable; choose a cream with at least thirty six percent fat for best results
- Chopped chocolate: your mousse base; select a high-quality chocolate for smoothness and depth of flavor
- Vanilla extract: adds warmth and complexity; if you can find vanilla bean paste it creates beautiful speckles
- Pinch of salt: balances the sweetness and amplifies chocolate flavor; use fine sea salt for the best dissolve
- Sugar: necessary for structure and shine of glaze; opt for pure cane sugar for cleanest taste
- Sweetened condensed milk: creates the creamy opaque base for mirror glaze; delivers richness and helps set the glaze
- Unflavored gelatin: essential for the mirror finish of the glaze; check that it is fresh and well within the expiration date
- White chocolate: forms the body of your mirror glaze; use real cocoa butter white chocolate for smooth melting
- Gel or powdered food coloring: produces vivid glaze colors without thinning the mixture; always use gel or powder not liquid
- Optional fillings: such as raspberry compote, chocolate ganache or cake bits for the surprise center inside each ornament; select fillings with intense flavors or contrasting textures
- Fondant, licorice or pretzels for edible “hooks”: add decoration and personality; gold dust or other festive sprinkles can be used for extra sparkle
How to Make It
- Creating the Silky Mousse Base:
- Chop the chocolate finely and place in a medium heatproof bowl. In a small saucepan, gently heat half the cream just until you see tiny bubbles at the edge. Pour hot cream over chocolate and let it sit one minute to soften. Stir gently until a smooth ganache forms then let cool to room temperature so it will not melt your whipped cream.
- Whipping the Cream:
- In a chilled bowl whip the remaining cream with vanilla and a pinch of salt until thick firm peaks form. Use a third of the whipped cream to lighten the chocolate mixture by folding it in briskly. Gently fold in the rest being careful not to deflate the mix. The result should be silky and airy.
- Assembling the Ornaments:
- Using silicone sphere molds spoon mousse into each cavity about one third full. Drop a spoonful of your center filling into the middle. Cover with more mousse up to the top and smooth with a spatula for a flat base. Freeze until solid for at least four hours or ideally overnight.
- The Magic of the Mirror Glaze:
- Before glazing bloom gelatin by sprinkling it over cold water allow to become a spongy mass. In a saucepan heat water sugar and condensed milk until hot but not boiling stirring constantly. Remove from heat and add bloomed gelatin stirring until it dissolves. Add finely chopped white chocolate and stir until completely melted and smooth.
- Color and Cool the Glaze:
- Strain the glaze through a fine mesh sieve to ensure it is lump free. Add gel food coloring to your liking then blend for a smooth finish. Let cool until it is just warm to the touch about ninety degrees Fahrenheit. This is key for a flawless pour.
- The Grand Finale Glazing and Decorating:
- On a parchment lined tray with a wire rack unmold the frozen mousse domes. Place flat side down on the rack. Quickly pour glaze in bold swirls allowing excess to drip. Immediately add fondant hooks or sprinkles before the glaze sets. Present on a simple plate for maximum color impact.
- Make It Your Own:
- Variations include peppermint dark chocolate mousse with peppermint glaze and ganache center, tropical white chocolate mousse with fruit curd center, cookies and cream with crushed cookies added, or adult eggnog flavor with nutmeg rum or bourbon and cake nugget inside.

The white chocolate in the glaze is my favorite because it is both the canvas for bold colors and creates that glass-like finish. My family loves to pick their favorite color at the dessert table and every year it sparks new ideas for fillings.
Flavor Boosters
For dairy free versions swap coconut cream for the heavy cream and condensed coconut milk for the regular condensed milk. Use dairy free white chocolate and check filling and chocolate options for allergens. If you do not have silicone molds use any flexible mold or shape with gloves by hand for a homemade look.
Serving Suggestions
Present each ornament on a white plate dusted with powdered sugar or with edible gold luster for holiday sparkle. Pair with tart fruit sauce or crème anglaise on the side. They make beautiful centerpieces when arranged on a cake stand with winter greenery.
Creative Twists
For spring try pastel glaze colors and lemon mousse. Summer is perfect for berry mousse with bright red or blue glaze. In fall use spiced pumpkin or caramel mousse with gold or copper shimmer. Any holiday can be celebrated with a change of glaze and filling.
The real joy of this recipe is making it your own so experiment with flavors and colors that make your festive table shine brightest.
Common Questions About This Recipe
- → How can I achieve a smooth and shiny mirror glaze?
Ensure your glaze's temperature is around 90°F and that your mousse spheres are frozen solid. Always strain the glaze through a fine-mesh sieve to remove lumps for a flawless, glossy finish.
- → Can I prepare these mousse balls in advance?
Yes, the mousse spheres can be made and frozen a week ahead. Glaze on the day of serving. Glazed balls keep in the fridge for 1–2 days.
- → What creative filling options work well inside the mousse balls?
Center your spheres with raspberry compote, peppermint ganache, passion curd, cake bits, or crushed cookies for festive flavor twists.
- → What if I don’t have silicone sphere molds?
Use any silicone mold shape, cupcake trays, or even roll mousse into balls by hand for a rustic appearance before glazing.
- → How do I prevent glaze streaks or melting mousse?
Make sure mousse is deeply frozen and glaze is at the correct temperature. If the mousse thaws at all before glazing, return to freezer until ready.