
 Pin
Pin
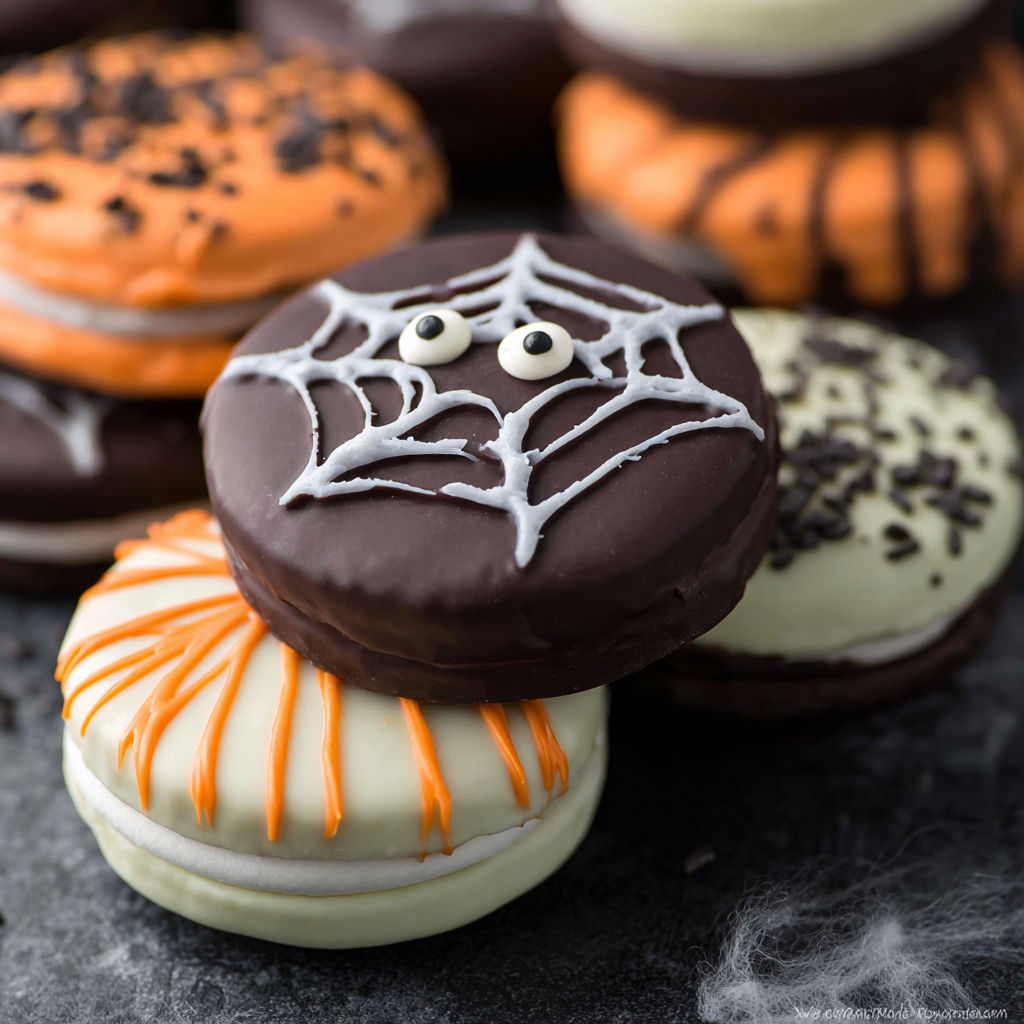
These easy Halloween dipped Oreo cookies are my lifesaver when I want a festive treat that does not keep me in the kitchen all afternoon. Sweet crispy Oreos dunked into vibrant melted chocolates and finished with a sprinkle of creativity are always the talk of the party table and they come together so fast you will find yourself looking for excuses to make them year-round.
I started making these for my daughter’s first school Halloween bash and every year she runs up asking for them when she spies the first bags of candy melts in the store.
Gather Your Ingredients
- Halloween Oreos: Bring fun colors with a familiar taste. You can swap in any favorite sandwich cookie.
- Chocolate melting wafers: Offer the deepest rich chocolatey shell. Opt for a high-cocoa version if you can.
- Orange candy melting wafers: Create instant pumpkin or fall vibes. Choose bright ones for a bolder look.
- White candy melting wafers: Make a blank canvas for the rest of your decorations. Go for pure white rather than ivory versions for a more striking effect.
- Purple candy melting wafers: Add a pop of eerie color. Look for ones made with natural food dye for a flavor boost and less artificial aftertaste.
- High-quality melting wafers: Smooth out that cookie shell so easily. Look for glossy wafers that do not have a waxy residue and try a couple different brands until you find your favorite.
How to Make It
- Prepare Your Cookie Sheet:
- Line a baking tray with wax paper or parchment paper and make sure it sits flat on your work area. This stops cookies from sticking and makes cleanup so easy.
- Melt Your Candy Wafers:
- Place each color of melting wafers in a separate microwave-safe bowl. Start microwaving one bowl at a time in thirty second intervals, stirring between each round until silky smooth. This usually takes about one minute total.
- Dip the Cookies:
- Drop one Oreo into your melted chocolate or colored candy. Use a spoon to cover all sides fully.
- Remove and Tap:
- Slide a fork gently under your cookie and lift it out. Tap the fork a few times on the side of the bowl to let any extra coating drip off. This step keeps your cookies neat and saves your sprinkles from running all over.
- Decorate Immediately:
- Place the dipped Oreo on your lined baking sheet and scatter on sprinkles or edible eyes right while the coating is wet so everything sticks. Press gently if needed for bigger toppings.
- Set and Enjoy:
- Let the cookies rest at room temperature until the candy sets up, about ten to fifteen minutes, or pop them in the fridge to speed things along.

I always go a little wild with the purple candy coating. It just looks so striking on a holiday platter. I remember my nephew insisting on a whole tray of purple and orange for his monster birthday theme.
Flavor Boosters
Try any sandwich cookie, even gluten free or store brand versions. No melting wafers in your area? Carefully melt white or dark chocolate chips with a splash of coconut oil for a dipable shell. Allergy alert: Use vegan or allergy-friendly chocolate types and skip sprinkles that contain gluten or artificial dyes.
Serving Suggestions
Arrange the dipped Oreos on a platter with extra candy eyes or colorful candies scattered between. Package a trio in clear treat bags for party favors. Set out a bowl of different colored candy melts and let kids dip and decorate their own for a Halloween activity.
Creative Twists
These dipped cookies have roots in old-fashioned chocolate-dipped sweets from holiday trays. It is such a fun way to bring everyone together. Kids especially love to take over the decorating. Decorate with green candy melts for St Patricks, white and red for Valentines, or red and green for Christmas— the method stays the same.
One year my daughter held a cookie decorating race at her Halloween party and every kid left with giggles and a bag of masterpieces. Parents texted for the recipe before lunch was even over. Every season someone requests these cookies because they are not just cute, they are that good.
Common Questions About This Recipe
- → What type of Oreos work best for this?
Halloween Oreos look most festive, but any sandwich cookie works perfectly for dipping and decorating.
- → Can I use white chocolate instead of candy melts?
Yes, white chocolate is a great substitute for candy melts. Just add oil-based coloring if you want vibrant shades.
- → What sprinkles should I use for decoration?
Halloween-themed sprinkles such as bats, pumpkins, or classic orange and black jimmies make a fun, seasonal finish.
- → How long do dipped Oreos stay fresh?
Store in an airtight container for up to one week. Keep cool to maintain crispness and prevent melting.
- → Can kids help make these treats?
Absolutely! Dipping and decorating Oreos is simple and safe for kids with a bit of adult supervision when melting candy.