
 Pin
Pin
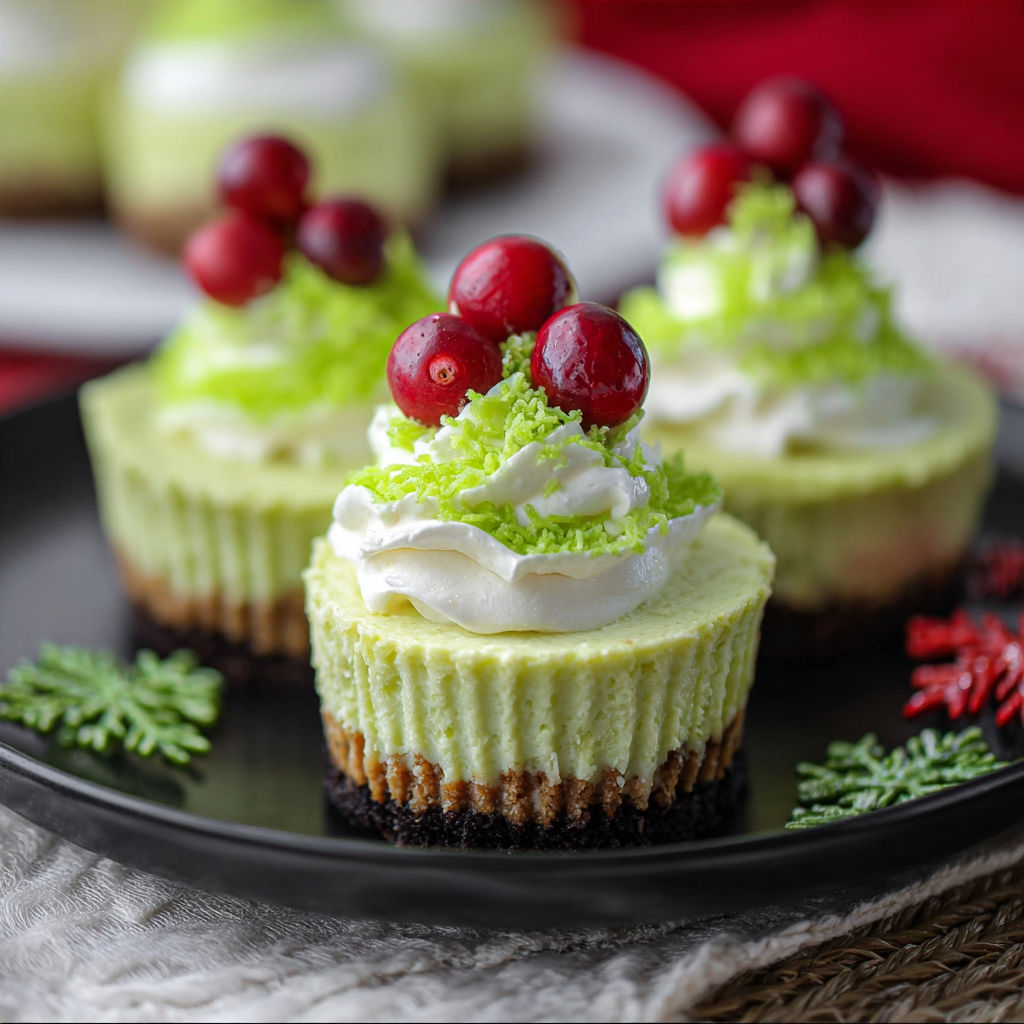
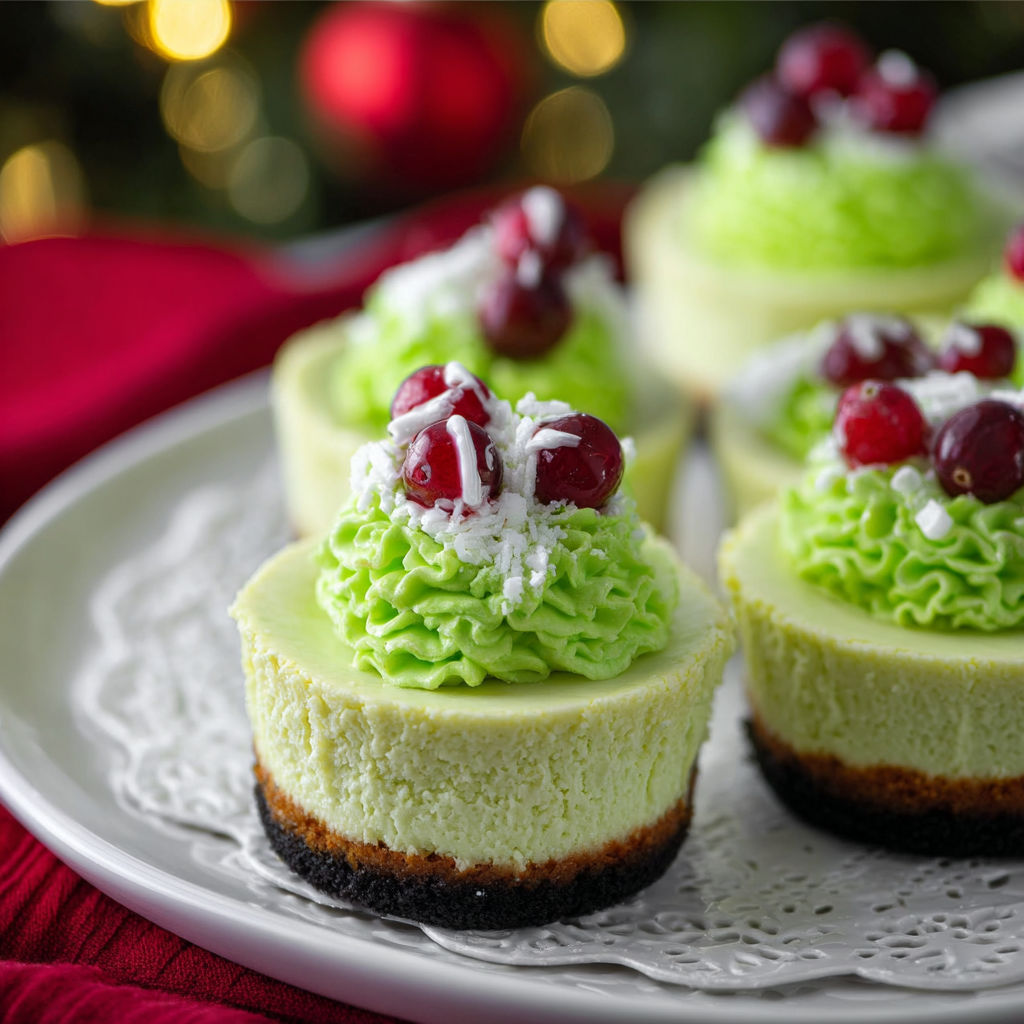
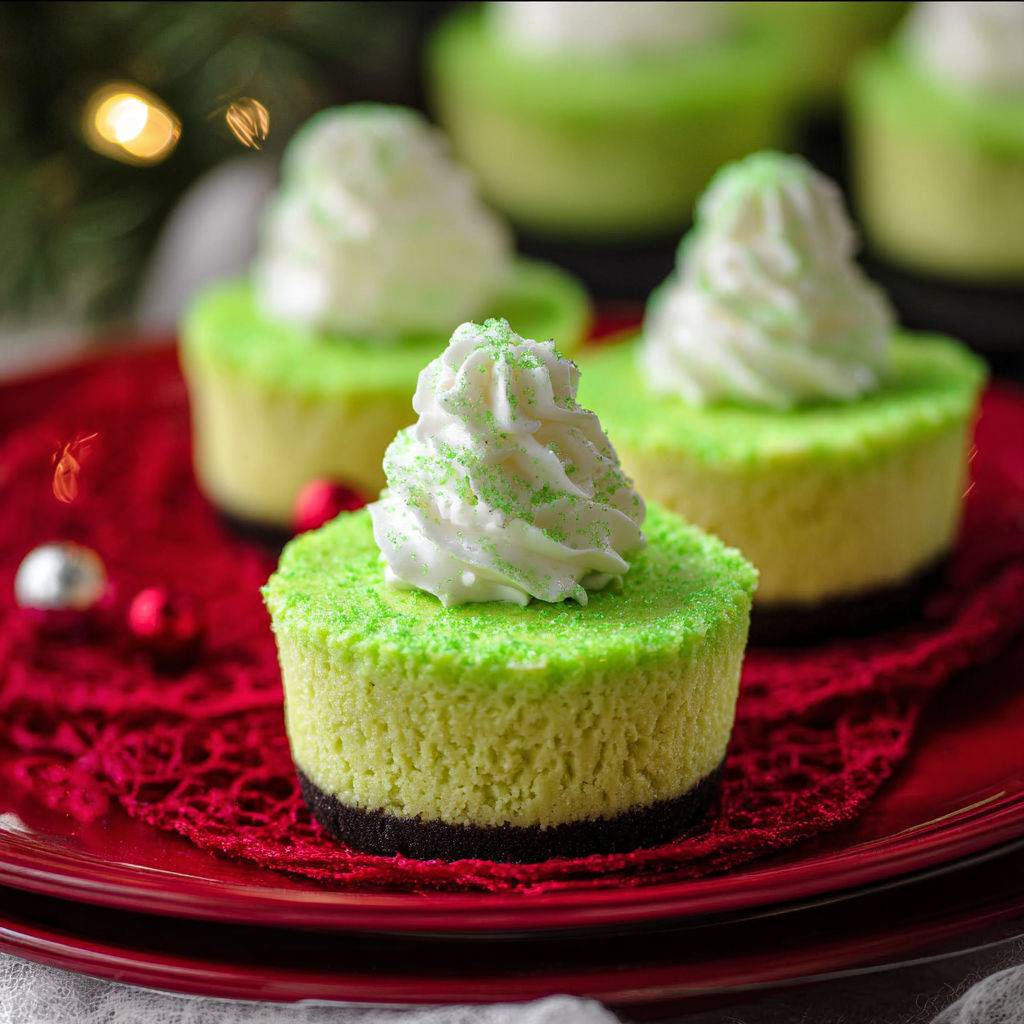
Whipping up these fun grinch mini cheesecakes is always a bright spot in our holiday baking. Their creamy base and whimsical neon color bring big smiles to my kitchen whether for parties or a cozy night in. The Oreo crust meets a tangy cream cheese filling with a touch of cheerful green making these treats a hit with both kids and grown ups.
I first baked these with my niece for a movie night and ever since every December she asks to make them together again. The novelty never wears off and even adults sneak seconds.
Gather Your Ingredients
- Cream cheese: choose full fat blocks and let them fully soften for extra creaminess
- Sugar: lends classic sweetness use fine granulated for best mixing
- Eggs: create structure and velvety texture always use large eggs at room temperature
- Vanilla: enhances every layer with warmth use pure extract for best flavor
- Oreo crumbs: create the signature crust blend them right before using for freshness
- Butter: melted just enough to bind the cookie crumbs go for unsalted to control the overall taste
- Neon green food coloring: essential for that grinch effect gel versions give intense color without thinning the batter
- Whipped cream and sprinkles: optional but bring festive flair choose a stabilized whipped topping for the best look
How to Make It
- Preheat and Prep:
- Preheat your oven to three hundred fifty degrees and line a cupcake muffin pan with eight to twelve paper liners depending on your pan size get your ingredients measured out and allow cream cheese to reach room temperature for an ultra smooth finished batter
- Make Oreo Crust:
- Pulse about ten to eleven whole Oreos in a food processor until they resemble fine sand add the melted butter then pulse again so every crumb is lightly coated this step is key for a crust that holds together and does not get soggy
- Form Crusts:
- Divide the crumb mixture evenly among each liner about two tablespoons per cup use the back of a spoon or a small measuring cup to press the crumbs into a flat compact base take your time and go edge to edge for even thickness
- Mix Filling:
- In a medium bowl beat softened cream cheese and sugar together until fluffy and entirely lump free scraping the bowl as needed add eggs one at a time blending just until incorporated lastly mix in the vanilla do not over mix or the filling might crack later
- Add Color:
- Stir in the neon green food coloring a few drops at a time mixing until you reach your desired Grinchy color do this gradually to control intensity scrape the sides of the bowl to distribute color evenly
- Fill Cups:
- Use a spoon or scoop to portion about one quarter cup of the filling into each liner the cups should be nearly full but not overflowing tap the tray gently on the counter to pop any air bubbles
- Bake:
- Place the tray in the preheated oven and bake for fifteen to seventeen minutes the centers should look slightly jiggly when you lightly nudge the pan this means they are set but not dried out
- Cool and Chill:
- Let cheesecakes cool fully in the pan at room temperature for at least thirty minutes then cover and transfer to the refrigerator to chill until firm another fifty to sixty minutes is ideal this makes them easy to unmold and extra creamy
- Decorate:
- When ready to serve top each cheesecake with a swirl of whipped cream and festive sprinkles if using you can get creative with holiday shapes or extra bits of Oreo for crunch
My personal favorite part is swirling in the green coloring and seeing just how bright we can get it. My family always laughs as we compare each batch to our old holiday photos with these treats front and center. The Oreo crust is never left behind not even crumbs.
Flavor Boosters
Storage Tips Grinch mini cheesecakes store beautifully when covered tightly in the fridge. You can keep them for up to four days. For longer storage pop the cooled cheesecakes in a freezer safe container separating layers with parchment paper. Thaw in the refrigerator overnight and decorate just before serving. These minis are perfect to make in advance for a hassle free holiday dessert table.
Serving Suggestions
Serve chilled straight from the fridge for the creamiest bite. Top each with a maraschino cherry to mimic the Grinch’s heart or use candy hearts and extra Oreo crumbles for whimsical decorations. These minis pair well with hot cocoa or a Christmas themed mocktail for a festive movie treat.
Creative Twists
Ingredient Substitutions If you prefer another cookie crust try chocolate grahams or gingersnaps. Gluten free cookies work just as well. For a slightly tangier filling swirl in a tablespoon of Greek yogurt before adding eggs. No green gel food color Stick with a few drops of standard food dye but you may need a bit more for the same vivid effect.
There is just something about these playful cheesecakes that calls everyone to the table. I still look forward to mixing up a fresh batch every December and seeing who in the family can get the brightest Grinch hue. Try them once and you might just start a new family holiday tradition.
Common Questions About This Recipe
- → Can I use a different cookie for the crust?
Yes, graham crackers or any chocolate sandwich cookie can be substituted for Oreos to create a different base flavor.
- → Is food coloring required for the green color?
Neon green food coloring helps achieve the signature Grinch hue; however, you can omit or use a natural coloring alternative if preferred.
- → How long do the cheesecakes need to chill?
After baking, allow the cheesecakes to cool fully in the pan and then refrigerate for at least 2 hours until set and firm.
- → Can I make these cheesecakes ahead of time?
Absolutely. Prepare a day in advance and store chilled, covered in the refrigerator until ready to serve.
- → What toppings go well with these cheesecakes?
Whipped cream and festive sprinkles add a fun touch, but you can also try crushed Oreos, mini chocolate chips, or candy stars.