
 Pin it
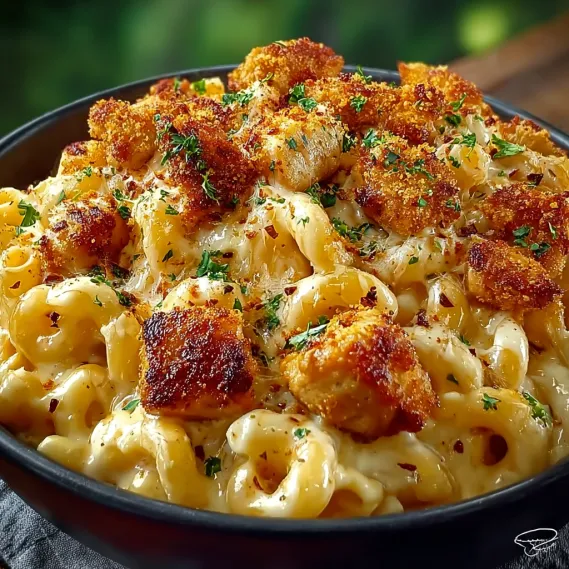
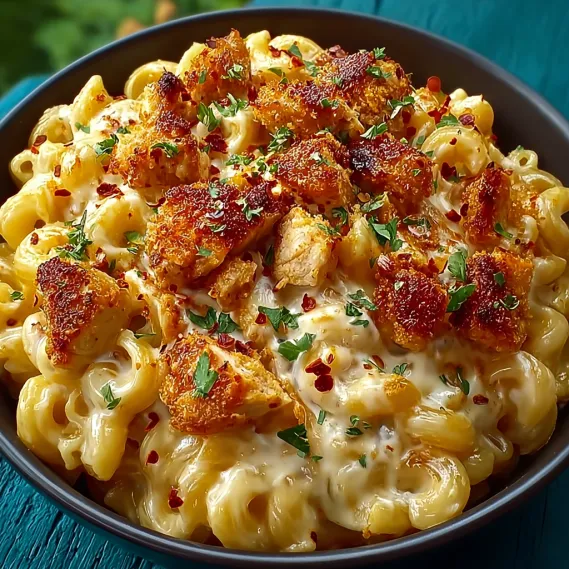
This hearty Creamy Honey Pepper Chicken Mac and Cheese Delight combines classic comfort food with a gourmet touch that elevates weeknight dinners. The contrast between velvety smooth mac and cheese and crispy honey-glazed chicken creates an unforgettable flavor experience that satisfies multiple cravings at once.
I created this recipe during a rainy weekend when my family was craving both comfort food and something with a bit of flair. The combination was such a hit that it quickly became our most requested special dinner.
Ingredients
For the Mac and Cheese
- Elbow macaroni: Forms the foundation classic comfort shape that holds sauce perfectly
- Butter and flour: Create the essential roux base for a silky smooth sauce
- Whole milk and heavy cream: Provide richness and body to the cheese sauce
- Cheddar cheese: Brings sharp flavor while mozzarella adds that perfect stretch
- Garlic and onion powder: Add depth without overwhelming the creamy base
For the Honey Pepper Chicken
- Buttermilk: Tenderizes the chicken while adding tanginess use full fat for best results
- All-Purpose flour: Creates the perfect crispy coating
- Paprika: Adds subtle smoky notes and beautiful color
- Black pepper: Provides warming heat that complements the honey glaze
- Vegetable oil: With high smoke point ensures perfect frying
For the Honey Pepper Glaze
- Honey: Provides natural sweetness use local if possible for complex flavor
- Soy sauce: Adds umami depth and balances the sweetness
- Cracked black pepper: Delivers that signature peppery kick visible in each bite
- Red pepper flakes: Optional but recommended for those who enjoy heat
Step-by-Step Instructions
Chicken Preparation
- Step 1:
- Soak chicken in buttermilk for at least 20 minutes allowing the acids to break down proteins and create tender meat. For even better results marinate overnight in the refrigerator for deeper flavor penetration and ultimate tenderness.
Coating and Frying
- Step 2:
- Dredge each buttermilk soaked piece thoroughly in the seasoned flour mixture ensuring complete coverage but gently shaking off excess. The oil should be at 350°F for optimal crispiness without burning. Fry in batches to maintain oil temperature working in a single layer without overcrowding the pan.
Glaze Creation
- Step 3:
- Simmer the honey mixture slowly on low heat watching carefully to prevent burning. The consistency should coat the back of a spoon but remain pourable. The magic happens when the hot glaze hits the crispy chicken creating a shiny caramelized exterior that seals in juiciness.
Mac and Cheese Base
- Step 4:
- Start with a proper roux cooking the flour and butter until it smells nutty but remains blonde in color. Add liquids gradually while whisking vigorously to prevent lumps. Pull the pot off heat before adding cheese to prevent the sauce from breaking stirring until completely smooth.
Final Assembly
- Step 5:
- Layer the components strategically with the mac and cheese base first followed by the glazed chicken pieces. This presentation allows the honey glaze to subtly flavor the pasta below while maintaining the chicken's crispy texture.
 Pin it
The honey glaze is my absolute favorite part of this recipe. I discovered its magic while experimenting with different chicken glazes, and the moment I paired it with mac and cheese, I knew I'd created something special. My teenage son who typically avoids “mixed foods” requests this dish weekly!
Make-Ahead Options
This dish components can be prepared separately up to two days ahead, making it perfect for busy weeknights. Store the mac and cheese base refrigerated in an airtight container, then reheat gently with a splash of milk to restore creaminess. The chicken is best prepared fresh, but you can bread it in advance and refrigerate until ready to fry. Assemble just before serving for the perfect texture contrast.
Variations To Try
For a lighter version, consider baking the chicken instead of frying. Coat buttermilk-soaked pieces with panko breadcrumbs mixed with your seasonings, spray with cooking oil, and bake at 425°F until crispy and cooked through. The honey glaze works beautifully with baked chicken too. For a spicier kick, add cayenne to both the chicken coating and the glaze.
Serving Suggestions
This mac and cheese shines alongside simple, fresh sides that balance its richness. A crisp green salad with vinaigrette or steamed broccoli provides welcome contrast. For entertaining, serve in individual ramekins with the glazed chicken artfully arranged on top and a sprinkle of fresh chives. A cold craft beer or crisp white wine makes this casual dish feel special enough for company.
The Secret To Perfect Cheese Sauce
The key to silky smooth cheese sauce is temperature control and gradual incorporation. Always grate your own cheese rather than using pre-shredded, which contains anti-caking agents that prevent proper melting. Remove your white sauce from heat before adding cheese, and stir in handfuls gradually, allowing each addition to melt completely before adding more. This prevents the proteins from seizing and creating a grainy texture.
Frequently Asked Questions
- → How can I ensure the chicken is crispy?
Make sure to dredge the chicken pieces evenly in the flour mixture and fry at medium heat until golden brown for a perfectly crispy texture.
- → Can I make this dish in advance?
You can prepare the glaze, cheese sauce, and cook the chicken ahead. Reheat and assemble right before serving to maintain crispiness.
- → What can I substitute for buttermilk?
If you don't have buttermilk, mix 1 cup of milk with 1 tablespoon of vinegar or lemon juice and let it sit for 10 minutes before using.
- → Can I use a different type of pasta?
Yes, you can substitute elbow macaroni with other small pasta shapes like penne, rotini, or shells based on your preference.
- → How can I adjust the spice level?
To make the dish less spicy, reduce or omit the red pepper flakes from the glaze. For more heat, add extra pepper flakes or a dash of hot sauce.