
 Pin
Pin
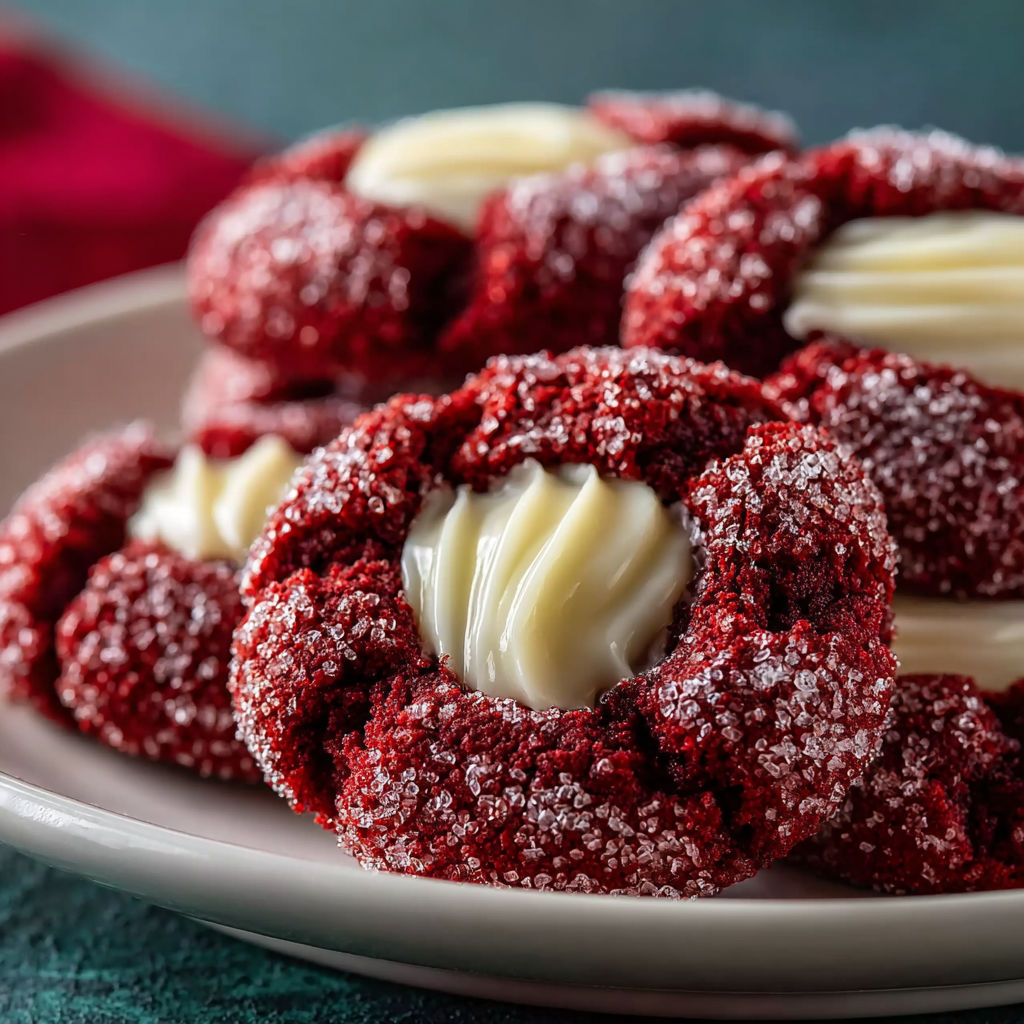
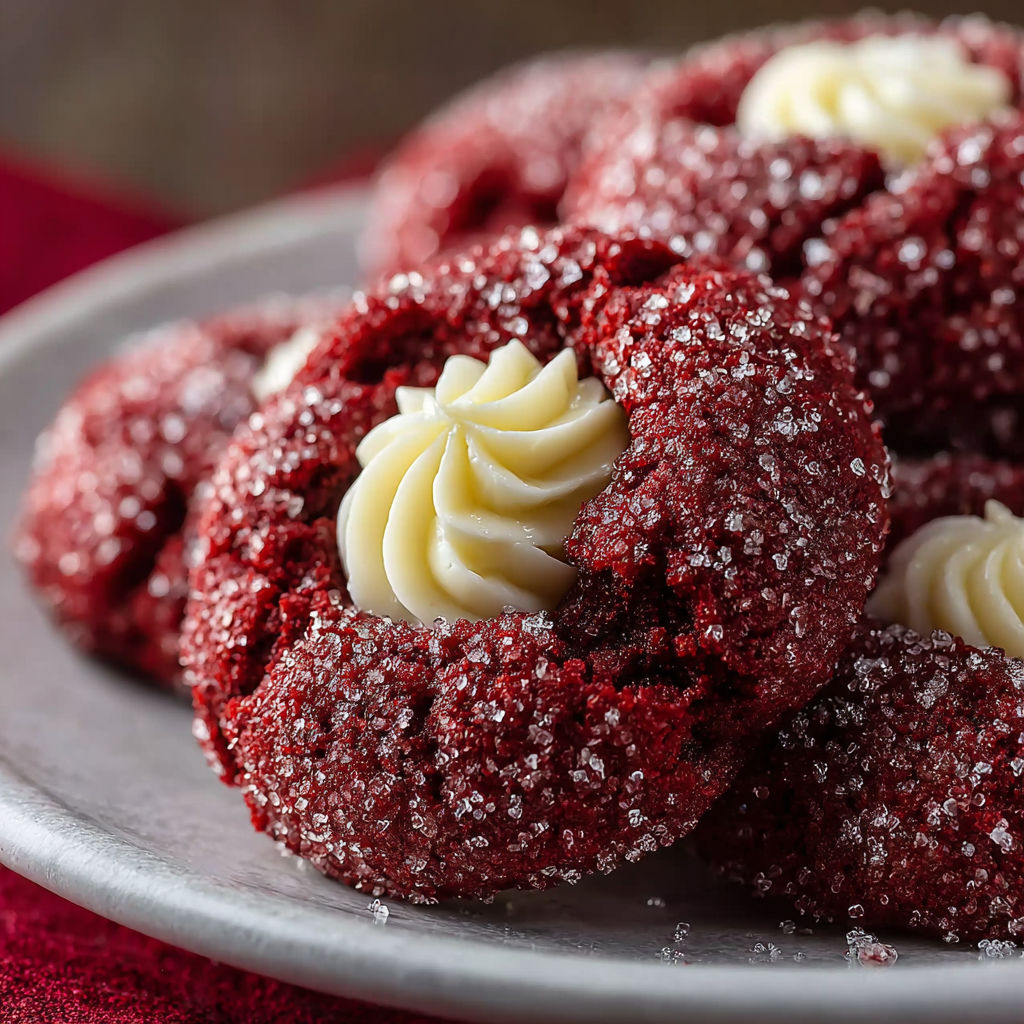
Red velvet thumbprint cookies are a playful treat that marries the tangy sweetness of classic red velvet cake with the soft, creamy center of a thumbprint cookie. Perfect for holidays, gatherings, or just to brighten up an ordinary afternoon, they bring both tradition and a splash of color to your dessert table. The deep cocoa notes and rich buttery scent take me right back to winter days spent baking with my cousins—everyone sneaking tastes of the dough before it even hit the oven.
My family adores these cookies during the holidays—they look impressive on a cookie tray but are surprisingly low effort. Every year, we end up doubling the recipe because they disappear so fast.
Gather Your Ingredients
- All purpose flour: Gives structure and chew. Choose fresh unbleached flour for best texture
- Unsweetened cocoa powder: Lends deep chocolate flavor. Opt for Dutch processed for a smoother finish
- Baking soda: Ensures cookies rise slightly and stay soft
- Salt: Balances sweetness and highlights the cocoa
- Unsalted butter: Creates richness in both the cookie and filling. Try to use European-style butter for extra creaminess
- Granulated sugar: Sweetens and gives a crisp crust. Make sure it is fresh and lump-free
- Large eggs: Bind everything together and add tenderness. Room temperature eggs blend more evenly
- Vanilla extract: Warms up the cocoa notes. Use pure extract for best taste
- Red food coloring: Gives vibrant color to the dough. A gel type will provide a deeper hue
- Buttermilk: Adds tang and helps create a tender crumb. Use real cultured buttermilk for best results
- Powdered sugar: Sweetens and thickens the creamy filling. Sift to avoid lumps
- Cream cheese: Adds signature tang and creaminess to the center. Use full-fat block cream cheese
- Parchment paper: Prevents cookies from sticking
- Shallow dish: For rolling sugar to coat each cookie evenly
How to Make It
- Mix Dry Ingredients:
- In a medium bowl whisk flour cocoa powder baking soda and salt until well combined so the leavening is distributed and cocoa is even
- Cream Butter and Sugar:
- In a large bowl beat the softened butter with granulated sugar for two to three minutes until pale and fluffy which gets air into the dough and makes it light
- Add Eggs, Vanilla and Food Coloring:
- Add eggs one at a time mixing thoroughly each time. Follow with vanilla extract and red food coloring mixing until you see a vibrant color and smooth texture
- Combine Wet and Dry Ingredients:
- Gradually mix the dry ingredients into the wet mixture alternating with buttermilk. Mix just until you have a thick slightly sticky dough
- Shape and Sugar Coat:
- Scoop out tablespoon portions of dough and roll each into a smooth ball. Roll in granulated sugar so every surface is coated. Place on parchment lined baking sheets about two inches apart
- Bake:
- Bake in the preheated oven at 375 degrees Fahrenheit for about 12 minutes until cookies are set but still soft. Gently press the center of each with a spoon for the classic thumbprint
- Make the Cream Cheese Filling:
- While cookies cool beat softened cream cheese and butter until creamy. Add sifted powdered sugar and vanilla extract. Mix until smooth and thick
- Fill Centers:
- Once cookies are cool spoon or pipe cream cheese filling into each thumbprint center creating a generous creamy pool
- Chill and Serve:
- Let filled cookies chill for at least thirty minutes to firm up before enjoying. This helps the flavors meld and gives the cookies their perfect texture

One of my fondest memories is letting my niece color the dough. Every time she giggled when her hands turned bright red I learned to double check nobody licked their fingers before washing up.
Flavor Boosters
You can swap buttermilk for whole milk mixed with a teaspoon of lemon juice in a pinch. For a dairy free version use plant based butter and dairy free cream cheese. I have also tried a touch of lemon zest in the filling for a subtle tangy twist. If you are short on red food coloring the cookies still taste wonderful with a natural lighter hue.
Serving Suggestions
Arrange these cookies on a pretty platter sprinkled with extra cocoa powder. Try making mini versions for tea parties or baby showers. For an extra special treat drizzle a little melted chocolate over the filled centers.
Creative Twists
Red velvet is a classic Southern flavor with roots in Depression era baking when creative techniques made cake more tender. The modern thumbprint style gives these cookies an approachable twist perfect for celebrations. In colder months these feel extra festive with their bold color and decadent filling but they work year round wherever you want something both pretty and delicious.
Last winter I brought a tin of these to my book club and not a single crumb remained. People asked for the recipe before dessert was even finished. Once you see those bright centers and taste the creamy filling you will understand the cookies get requested for every family event.
Common Questions About This Recipe
- → How do I achieve the signature red velvet color?
The deep red color comes from red food coloring. Mix it into the dough with vanilla extract to ensure even color distribution.
- → Can I substitute buttermilk in the dough?
Yes, if you don’t have buttermilk, combine regular milk with a teaspoon of vinegar or lemon juice and let it sit for a few minutes.
- → What makes the cookies soft and chewy?
The combination of creamed butter, granulated sugar, and buttermilk in the dough results in a tender crumb with a chewy texture.
- → How do I keep the cream cheese filling smooth?
Ensure the cream cheese and butter are well softened before mixing, then beat together with powdered sugar for a creamy, lump-free filling.
- → Can these cookies be made ahead of time?
Yes, you can store baked cookies in an airtight container or refrigerate the dough for up to 48 hours before baking.