
 Pin
Pin
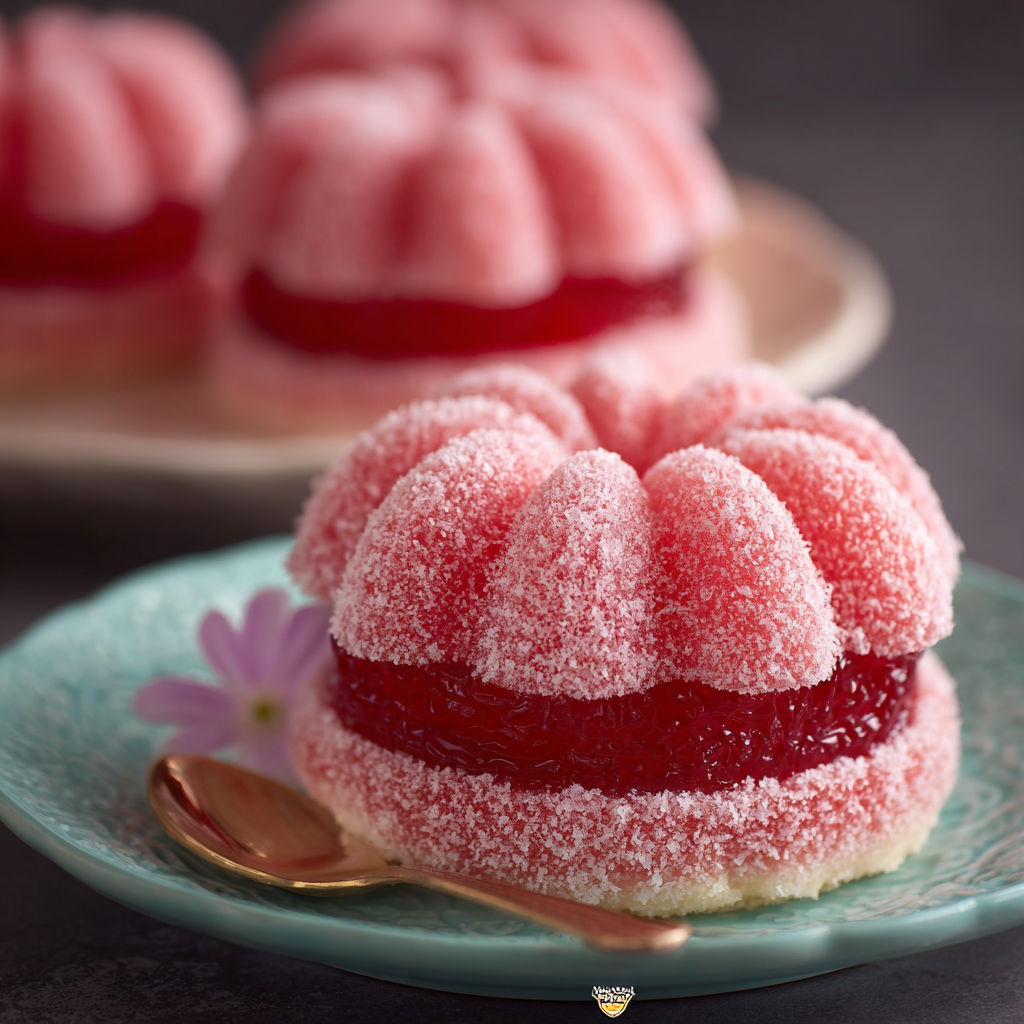
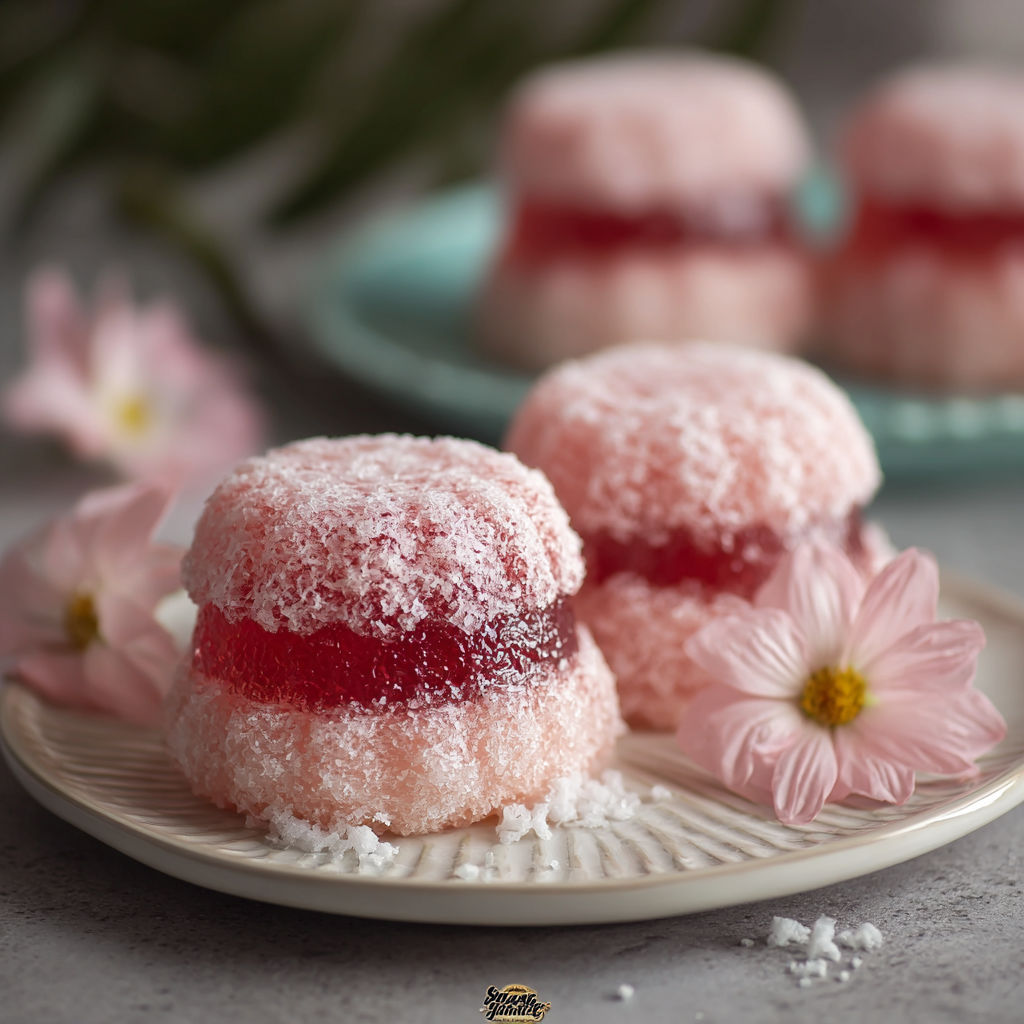
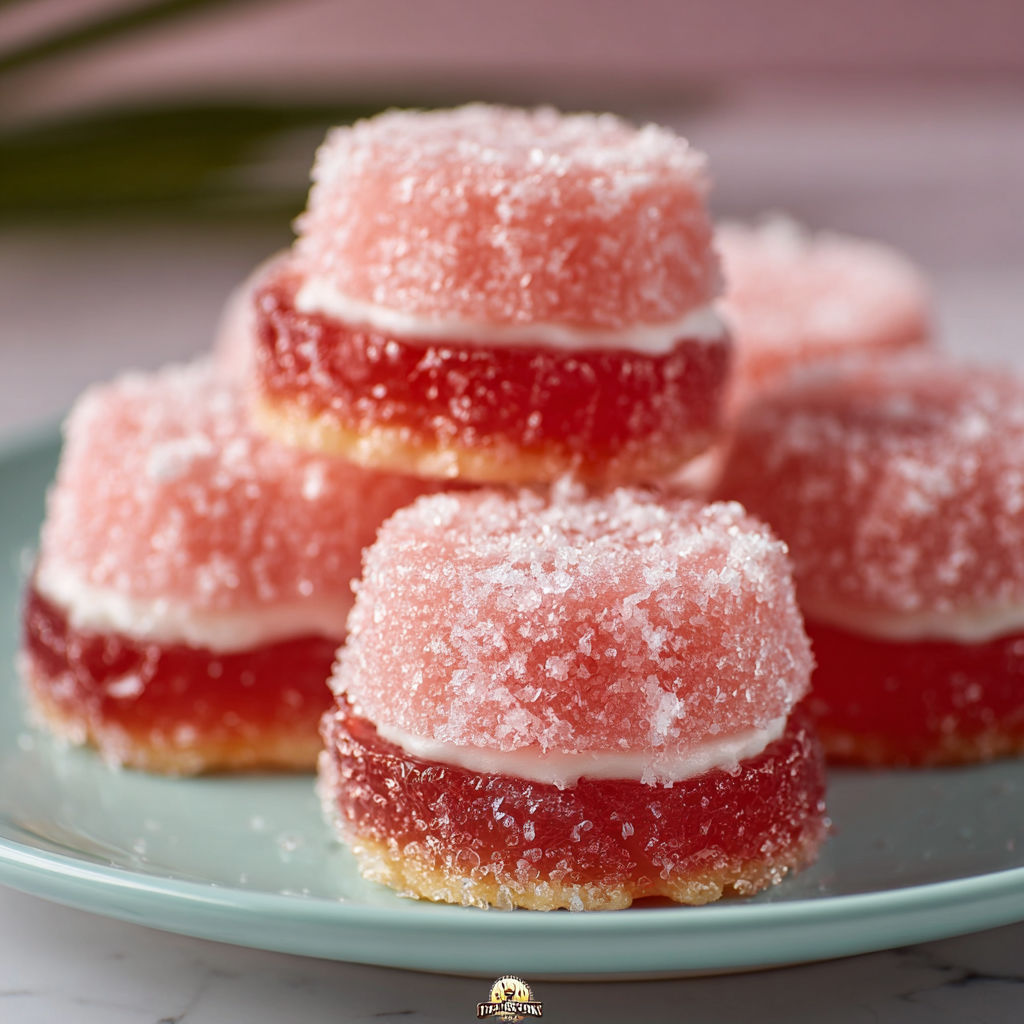
This old-fashioned pink jelly cakes recipe brings together soft buttery sponge and sweet strawberry jelly for a nostalgic treat that never fails to impress. Each bite offers a delightful combination of fluffy cake, fruity jelly, and the crunch of coconut all wrapped together with whipped cream. It’s perfect for parties, afternoon tea, or whenever you want a charming classic dessert.
I tried this recipe during a family gathering, and it quickly became a hit with both kids and adults. Now it regularly appears in our dessert rotation, especially for celebrations.
Gather Your Ingredients
- Butter: softened for creaming helps achieve a light and fluffy cake texture
- Caster sugar: provides even sweetness and dissolves well
- Vanilla extract: enhances the cake’s flavor with a warm aromatic note
- Egg: binds the ingredients and adds moisture and richness
- Milk: balances the batter and keeps the cake tender
- Self-raising flour: ensures the cakes rise beautifully make sure it is fresh for best results
- Strawberry jelly crystals: deliver the signature pink color and fruity topping
- Boiling water: for melting the jelly crystals thoroughly
- Cold water: cools the jelly to a safe dipping temperature and helps it set
- Desiccated coconut: adds a sweet chewy outer texture and visual appeal
- Whipped cream: acts as the luscious filling making the cakes indulgent but not heavy
How to Make It
- Spoon and Grease:
- Prepare the oven at 175 degrees Celsius fan-forced and lightly grease two 12-hole patty-pan tins so the cakes will release easily
- Cream Butter Sugar and Vanilla:
- In a large bowl cream softened butter caster sugar and vanilla extract together until the mixture becomes pale and fluffy which takes a few minutes by hand or mixer
- Incorporate the Egg:
- Beat in the egg completely ensuring it is fully mixed to maintain batter consistency
- Fold in Milk and Flour:
- Gently fold in the milk and self-raising flour alternately in two batches starting with half the milk then half the flour and repeat to avoid over mixing which keeps the cakes tender
- Fill the Tins:
- Spoon the batter into each patty-pan hole filling just below the top edge so the cakes bake evenly
- Bake the Cakes:
- Place the tins in the preheated oven and bake for 15 to 18 minutes until lightly golden and a skewer inserted in the middle comes out clean signaling doneness
- Cool the Cakes:
- Remove from the oven and cool the cakes in their tins for 5 minutes before transferring to a wire rack to cool completely preventing soggy bottoms
- Prepare the Jelly:
- Dissolve the strawberry jelly crystals in boiling water stirring until fully melted then add cold water to cool it down and chill in the fridge until it is partially set this takes about 1 to 2 hours
- Dip and Roll:
- Dip each cooled cake completely in the jelly using a slotted spoon letting excess jelly drip off before rolling the cake in the desiccated coconut coating thoroughly
- Assemble the Sandwich:
- Spoon whipped cream on one side of a coconut-coated cake and sandwich it gently with another cake to create a delightful sandwich style treat
My favorite part is the jelly dip stage where you see the cakes transform from ordinary to beautifully glossy pink treats. When I first served these at a tea party my grandmother exclaimed they tasted just like the ones she enjoyed as a child which made the moment extra special.
Flavor Boosters
Swap the whipped cream for a dollop of chilled crème fraîche or mascarpone which holds up better in warmer temperatures. For a winter twist add a pinch of cinnamon to the batter for seasonal warmth. Experiment with different jelly flavors to match the season such as peach or raspberry.
Serving Suggestions
Serve these pink jelly cakes with a cup of tea or coffee for a classic afternoon treat. They also pair wonderfully with fresh berries or a light fruit salad for a refreshing contrast. To make them extra festive you can dust a little icing sugar over the finished sandwiches.
Creative Twists
Pink jelly cakes were a popular party treat in mid-20th century Australia and New Zealand often appearing at children’s birthday parties or community gatherings. Their appeal lies in the playful colors and textures which capture a bit of nostalgia while still delighting modern palates.
These pink jelly cakes combine nostalgic flavors with simple techniques resulting in a delightful dessert perfect for any occasion. Enjoy the process and the smiles they bring to your table.
Common Questions About This Recipe
- → What type of jelly crystals are used?
Strawberry jelly crystals are used to give the cakes their distinctive pink color and fruity flavor.
- → Can I use a different flour?
Self-raising flour is recommended to ensure the sponge rises well, but you can substitute with plain flour and baking powder if needed.
- → How long should I refrigerate the jelly?
Chill the jelly mixture for 1–2 hours until it is partially set, which helps for easy dipping and coating of the cakes.
- → What is the best way to store these cakes?
Store the assembled cakes in an airtight container in the refrigerator to keep them fresh and prevent the jelly from drying out.
- → Can these cakes be made ahead of time?
Yes, the sponge cakes and jelly can be prepared in advance. Assemble shortly before serving for the best texture and flavor.