
 Pin it
This Instant Pot Japanese Cheesecake transforms ordinary cream cheese into a cloudlike dessert that's less dense than American cheesecake but every bit as satisfying. The delicate texture and subtle sweetness make it perfect for those who prefer lighter desserts without sacrificing flavor.
I discovered Japanese cheesecake during a culinary tour of Tokyo and immediately knew I needed to create a simplified version at home. After numerous experiments, this Instant Pot method yielded the perfect jiggly texture that made my dinner guests think I had ordered from a specialty bakery.
Ingredients
- 3 large eggs: The foundation for that signature fluffy texture, make sure they're room temperature for maximum volume
- 4 ounces cream cheese: Philadelphia brand works beautifully, ensure it's softened for a smooth batter
- 4 ounces white chocolate: Adds richness and subtle sweetness, choose a quality brand for best results
- 1 teaspoon orange extract (optional): Brightens the flavor profile, but vanilla extract works wonderfully too
- 1 ½ cups water for the Instant Pot: Creates the steam environment essential for proper cooking
Step-by-Step Instructions
- Prepare Ingredients:
- Allow cream cheese to soften at room temperature for about an hour. Cold cream cheese will create lumps in your batter that are nearly impossible to remove. Separate eggs while cold (they separate more cleanly) and then let the whites come to room temperature for maximum volume when beaten.
- Melt and Mix Base:
- Gently melt white chocolate in 30-second microwave intervals, stirring between each until just melted. Overheating will cause it to seize. Combine with softened cream cheese using a silicone spatula, working slowly until perfectly smooth and glossy. The mixture should feel silky without any lumps.
- Add Yolks and Flavoring:
- Incorporate egg yolks one at a time, ensuring each is fully integrated before adding the next. Add orange extract if using, stirring until the mixture becomes a uniform pale yellow. The batter should be smooth enough to ribbon off your spatula.
- Beat Egg Whites:
- Using scrupulously clean beaters and bowl (any trace of fat will prevent proper whipping), beat the egg whites on medium speed until foamy, then increase to high until they form stiff glossy peaks. They should stand straight up when you lift the beaters, but avoid overbeating which creates a grainy texture.
- Combine Mixtures:
- Add one-third of the beaten whites to the cheese mixture to lighten it, then gently fold in remaining whites using a figure-eight motion with your spatula. Cut down through the center, across the bottom, up the side, and over the top. Continue until no white streaks remain but be careful not to deflate the mixture.
- Prepare for Cooking:
- Line a 6-inch cake pan with parchment paper on bottom and sides to prevent sticking. Pour batter into the pan, tap gently to release any large air bubbles, and cover tightly with foil to prevent condensation from dripping onto the cake surface.
- Pressure Cook:
- Add water to Instant Pot insert, place trivet inside, and carefully lower cake pan onto trivet. Secure lid, set valve to sealing position, and cook on high pressure for exactly 17 minutes. The precision of pressure cooking gives this delicate cake its perfect texture.
- Cooling Process:
- Allow natural pressure release completely (about 10-15 minutes) to prevent sudden temperature changes that could cause the cake to collapse. Remove cake and let cool at room temperature for 30 minutes before refrigerating for at least 2 hours. The cake will initially appear puffed but will settle as it cools.
This recipe reminds me of my first trip to Japan where I discovered these ethereal cheesecakes in a tiny Tokyo bakery. The baker there shared that the secret was in the gentle folding technique which I've tried to capture in this simplified version. Every time I make it, my family gathers around to watch it jiggle when served.
Temperature Matters
The temperature of your ingredients significantly impacts the success of Japanese cheesecake. Cold egg whites whip to greater volume but room temperature cream cheese blends more smoothly. This seeming contradiction is easily managed by separating your eggs straight from the refrigerator, then allowing the whites to come to room temperature while you prepare the cream cheese mixture. This small but crucial detail ensures your cheesecake achieves that characteristic cloudlike texture.
Troubleshooting Common Issues
A sunken center typically indicates undercooking or opening the Instant Pot too quickly after cooking. If your cake deflates dramatically, try adding an extra minute to the cooking time in your next attempt. Cracks on the surface usually mean the egg whites were overbeaten or the batter was mixed too vigorously, deflating the air bubbles that give the cake its structure. Remember that Japanese cheesecake is more delicate than its American counterpart, requiring a gentle touch throughout preparation.
Serving Suggestions
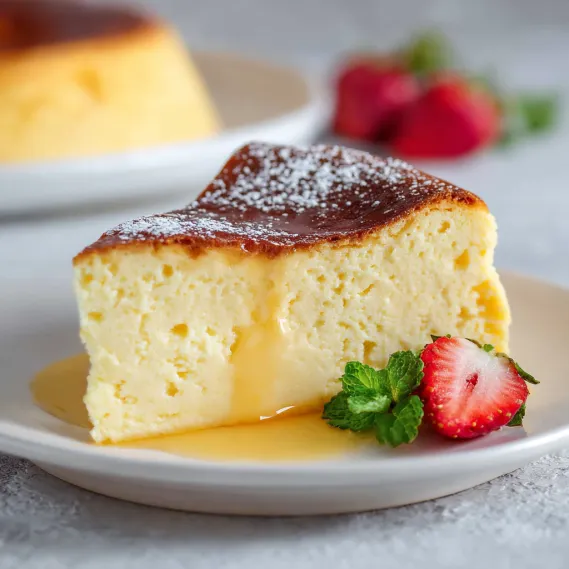
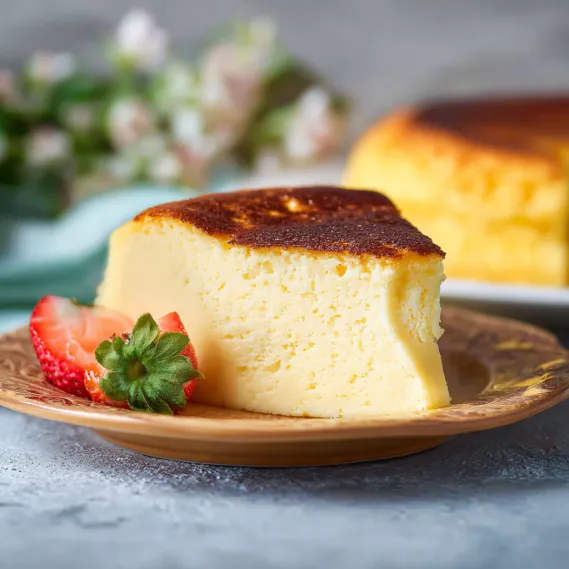
Unlike traditional cheesecake, Japanese cheesecake shines when served simply. A light dusting of powdered sugar is traditional, but fresh berries particularly strawberries or raspberries provide a beautiful color contrast and complementary tartness. For a more indulgent presentation, serve with a small pitcher of warm berry compote that guests can drizzle to taste. The cake is traditionally enjoyed slightly chilled rather than cold from the refrigerator, so allow it to sit at room temperature for 15 minutes before serving.
The Cultural Context
Japanese cheesecake, also called cotton cheesecake or soufflé cheesecake, emerged in Japan during the 1960s when Western desserts were being adapted to suit Japanese palates that typically prefer lighter, less sweet confections. Chef Tomotaro Kuzuno is credited with creating the first version after a trip to Berlin where he was inspired by käsekuchen, the German cheesecake. The style became wildly popular throughout Asia for its delicate texture and subtle flavor profile, representing the perfect fusion of Eastern and Western culinary sensibilities.
 Pin it
Frequently Asked Questions
- → Can I make this cheesecake without an Instant Pot?
Yes, you can bake it in a water bath in a standard oven. Adjust the cooking time and temperature accordingly, ensuring the cheesecake remains moist and fluffy.
- → What can I use instead of orange extract?
You can substitute orange extract with vanilla extract, lemon zest, or leave it out entirely for a more classic flavor.
- → Why do I need to beat the egg whites separately?
Beating the egg whites ensures the batter remains airy and gives the cheesecake its iconic light and fluffy texture.
- → Can I use a different type of chocolate?
White chocolate is key for this recipe, but you can experiment with milk or dark chocolate for a richer flavor, bearing in mind the texture may differ slightly.
- → How should I store Japanese cheesecake?
Store it covered in the refrigerator for up to 3 days. Allow it to come to room temperature before serving for the best texture.